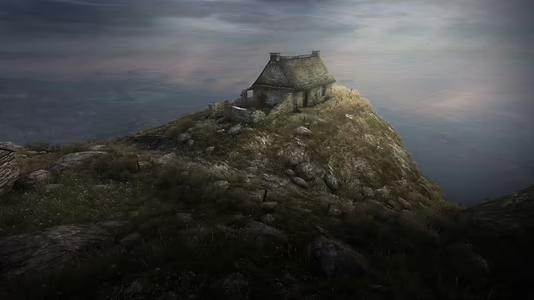
Dear Esther: Landmark Edition
10 Achievements
1,000
2-3h

Mullach an Eilein
Trigger all directors' commentary
150
18.66%
How to unlock the Mullach an Eilein achievement in Dear Esther: Landmark Edition - Definitive Guide
4:07-7:38 chapter 2
7:38-11:01 chapter3
11:01-17:02 chapter 4
after chapter 1 - 25%
after chapter 2 - 49%
after chapter 3 - 72%
after chapter 4 - 100%
really don't want to walk around the island for a forth time
Chapter 1
1. As you begin, it's right there.
2. In the house near the lighthouse.
3-7. As you walk away from that house, keep left instead of going up the incline. You will find this one and if you walk all the way to the tires past the Golden Ratio sand picture you will find several more.
8. On the stairs going up as you look back the way you came.
9-10. After the stairs turn back you will find these one after the other.
11-12. As you make your way to the cave, there are two among the rocks and vegetation.
13. In front of the cave.
14. As you walk toward the red light after the cave.
15. Among the stonehenge looking rocks.
Chapter 2
1. As you walk along, you will get this one.
2. Stay to the left to get this one.
3. Keep going, once you pass the point where you see the ship on your right you will get this one.
4-5. Shortly after 3, when you turn around to go down the incline you can see both of these.
6. On the edge of the hole as you follow the path above it.
7. Near a building on the right once you get to the area with the beams all over the ground.
8. After you pass the second building on the right, this one is behind a free standing stone wall behind the house.
9. This one is inside the house, near the table.
10. As you go down the path behind the house, you will find this one.
11. Shortly after the steps begin, you will find this one.
12. In a boat skeleton on the way to the cave.
13. To the right of the cave entrance.
14. Just outside of the cave entrance.
Chapter 3
1. Once you are done looking up,it is right there.
2. Right before you get to the red lit cave.
3. After you turn around and go up, it's there as you approach the green lit cave.
4. After you get out of the water, it's in the tunnel.
5. This is the one you can see from #3. As you carefully make your way around the green room you will get this one.
6. This is in the next runnel.
7. Partway across the stone bridge you will find this one.
8. As you climb up higher to the left you will get this one.
9. At the beginning of the big mushrooms you will find this one.
10. At the beginning of the next mushroom area past the red candlelights.
11. As you enter the water, you will run right into this one.
12-13. You can see both of these once you get to the underwater roadway area.
14. As you come up out of the water, it's right there.
Chapter 4
1. Straight ahead you can see it.
2. Turn left out of the cave and you will see it near a painting that looks like a gate.
3. This one is on a narrow pier to the left as you continue onward.
4. This one is on the mountain near the cards and candles.
5. Back down on ground level, between a beam and the mountainside.
6. Keeping to the right you will come across this one.
7. On the beach before you get to the cement pier, you will see it.
8. As you climb the stairs from the beach you will see this one.
9. You will see #10 and in about that same area is a minecar track leading back in the direction you just came from. You will find this one next to a shrine at the end of the path.
10. You will come across this one (you just saw it) after you turn around to head back along the path you were just on.
11. As you go uphill a bit past the path split with the next candle, you will find this one.
12. When you climb the rocks up to the place where the cliff comes to a point, it is there.
13. Back down in the gully, near the word "drink" you will see it.
14. At the bottom of the steps, you will find this one.
15. Just past the gate is this one.
16. Up some stairs, you see this one.
My tracker got stuck at 38% and stayed there even though I had found every single one. After I went all the way through chapter 2 from the main menu selection it dinged.
HERE'S THE BETTER GUIDE:
You don't have to follow any videos or read any other guides.
Here's all you need to now.
You will come across EVERY commentary by just seeing them in plain sight.
BUT, the one you'll most likely miss is in the FINAL CHAPTER near the end of the game, just before you ascend and start walking up the hill to the suicide tower, TURN AROUND right then, and follow the hidden RAILROAD TRACKS through the bushes to the end.
You're welcome.
To unlock this achievement, you need to trigger all 59 directors’ commentaries in the game. Start a new game and on the chapter select screen, check the box next to ‘Directors’ Commentary.’ Then select the first chapter, ‘The Lighthouse.’
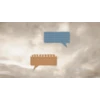
The commentaries look like orange pieces of paper along your path. When you trigger one, it will turn light blue, and when the commentary ends it will turn white. All you need to do to trigger these is walk through them and you will hear commentary about the games’ development. Most of these are very noticeable due to that they stand out against the environment. Around 85% of these are along the path you walk but some you must search for (and by search, I mean walking a short distance along an alternate path that generally leads to nowhere).
While your progress is tracked with the achievement tracker, individual commentaries are not tracked, so if you happen to miss one (or more), there will really be no way to know which one it is. That is why it is recommended that before you complete each chapter to check your achievement tracker to make sure you have a certain percentage before continuing. It’s really the only way to ensure you have triggered them all in a chapter.
- Chapter 1, ‘The Lighthouse’: 15 commentaries, 25% at the end of the chapter
- Chapter 2, ‘The Buoy’: 14 commentaries, 49% at the end of the chapter
- Chapter 3, ‘The Caves’: 14 commentaries, 72% at the end of the chapter
- Chapter 4, ‘The Beacon’: 16 commentaries, 100% at the end of the chapter
NOTE: At the end of the game when you reach the top of the mountain and walk through the gate, this will trigger one last commentary that does not count for the achievement.
Once you have triggered all 59 commentaries, the achievement will unlock. If you are having any trouble finding any of them, refer to the video below.
Thanks to VidGamiacUnlocked for the video:
You will encounter many comments in a linear manner. And some comments will be hidden, but you will be able to notice them too.
Here is a very good video guide.
By the way, it’s not necessary to listen to comets in full.


 Tropoebus
 TrueAchievements


 MateSpianSVK
 Seeker74
 x neotar x
 Quoth_the_Raven
 True
True bLaKgRaVy
 stratege.ru
 PSNProfiles