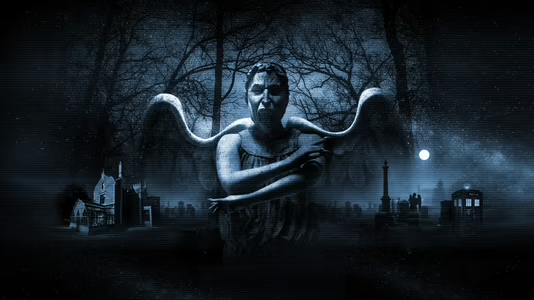
Doctor Who: The Lonely Assassins
16 Achievements
1,000
2-3h
Xbox One
Xbox Series

There's Something on the Phone!
Discovered the source of the corruption on the phone. Details for this achievement will be revealed once unlocked
30
44.4%
How to unlock the There's Something on the Phone! achievement in Doctor Who: The Lonely Assassins - Definitive Guide
Story-related and cannot be missed.
Midway through the game, you will be able to access the Wester Drumlin folder in the phone's Gallery. Once in there, you will need to piece together a puzzle made of glitchy puzzle pieces, which will give you access to the Wester Drumlin photos. Scroll through all of them (scanning one on the way) and then back out of the folder. This trophy will unlock soon after.
After unlocking this trophy, there will be a timed segment of the game. There's no timer on screen; the phone will just gradually turn gray, until it reboots into safe mode. You need to get the following done before the game reboots into safe mode; failure to do so will lock you out of Happy ever after... (you can still finish the game if you reboot into safe mode but you will need to do another playthrough for Happy ever after...
  ).
).
You will need to destroy all four corrupted data pieces.
First you need to talk to Osgood. She will unlock the ability to destroy the corrupted data - it works the same as scanning, except you need to spam to fill the bar instead of just holding it down. Only this time you will be interfered with while doing so. After clearing one corrupted data piece, Osgood will message you; just ignore her, as it is unnecessary and will just waste time.
1) Browser: The Into the Unknown bookmark - Click the moth picture, then the word "CUBE", then "no", then "I have my own path", While deleting the glitched picture, you will have to deal with some pop up windows - click "not interested", "I'm fine thanks" and "proceed").
2) Gallery: The Till Death Do Us Part album - The fifth picture (glitchy). You'll be sent to a few other photos during the process; just back out of the photo and go back into the glitchy photo to keep working at it.
3) Mail: The findme.web email - The glitched part of the message. Midway through, all of the emails will disappear and their orders will switch around - this is randomized so just click each bar until you find the glitched email again and continue to destroy it.
4) Chat: In Mo's message. Scroll up until you find the glitched part.The first few interruptions will put you into different parts of the message so you'll have to find your way back to the glitched part. The final interruption will bring up a ton of pop up windows; just close out of each of them before continuing to destroy them.
Once you have destroyed all four corrupted data pieces, go back onto the Home Screen. You will need to destroy the Weeping Angel on the home screen. Once you've done so, the timer will stop (you should notice that the screen returns to normal).
Midway through the game, you will be able to access the Wester Drumlin folder in the phone's Gallery. Once in there, you will need to piece together a puzzle made of glitchy puzzle pieces, which will give you access to the Wester Drumlin photos. Scroll through all of them (scanning one on the way) and then back out of the folder. This trophy will unlock soon after.
After unlocking this trophy, there will be a timed segment of the game. There's no timer on screen; the phone will just gradually turn gray, until it reboots into safe mode. You need to get the following done before the game reboots into safe mode; failure to do so will lock you out of Happy ever after...
You will need to destroy all four corrupted data pieces.
First you need to talk to Osgood. She will unlock the ability to destroy the corrupted data - it works the same as scanning, except you need to spam
1) Browser: The Into the Unknown bookmark - Click the moth picture, then the word "CUBE", then "no", then "I have my own path", While deleting the glitched picture, you will have to deal with some pop up windows - click "not interested", "I'm fine thanks" and "proceed").
2) Gallery: The Till Death Do Us Part album - The fifth picture (glitchy). You'll be sent to a few other photos during the process; just back out of the photo and go back into the glitchy photo to keep working at it.
3) Mail: The findme.web email - The glitched part of the message. Midway through, all of the emails will disappear and their orders will switch around - this is randomized so just click each bar until you find the glitched email again and continue to destroy it.
4) Chat: In Mo's message. Scroll up until you find the glitched part.The first few interruptions will put you into different parts of the message so you'll have to find your way back to the glitched part. The final interruption will bring up a ton of pop up windows; just close out of each of them before continuing to destroy them.
Once you have destroyed all four corrupted data pieces, go back onto the Home Screen. You will need to destroy the Weeping Angel on the home screen. Once you've done so, the timer will stop (you should notice that the screen returns to normal).
We cannot show the content due to copyright protection. Please click the link below to view the guide.


 themindisacity
 PSNProfiles