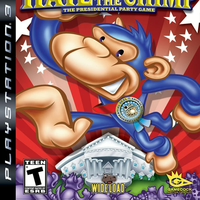
Hail to the Chimp
46 Achievements
1,000
Xbox 360

The Chosen One
Finish all Recount Challenges without losing a primary.
25
How to unlock the The Chosen One achievement in Hail to the Chimp - Definitive Guide
Do not let the identical ratios fool you. This achievement is MUCH harder then Animal’s Choice. Each of the recounts are set to the same difficulty as Crackers Challenge when going for Animal’s Choice. In addition to that, they are longer and have different game types then before. Ptolomey, Floyd, and Daisy go from 3 primaries to 5. Toshiro, Bean, Moxie, and Hedwig go from 5 to 7. For some reason Murgatroyd and Santo stay at 7 so be happy about that. But Crackers is now 11 primaries! Luckily for you, it’s all character assassin + 1 political minefield for the last primary, so I hope you’re good at those!
If you’re going for this, you will have already completed Animal’s Choice, so you should be more than familiar with the game by now. Remember, the saving mechanism still applies. If you lose, you’re potentially boned for good. So remember to sign out when you lose.
Here’s a little advice for each recount. You should be a master at all the game types by now as well as team ups, so I won’t repeat the same tips from the Animal’s choice guide. The most common game types you’ll come across will be Character Assassin, Political Minefield, Stench of Corruption, and Photo Op, so get good at those.
Oh and save Bean’s recount for last. It’s going to drive you mad.
Ptolomey: He’s fat and slow, this puts you at a disadvantage. For the most part, hang around the waterfall, gather clams, and do your thing. The toughest one here for him is going to be Character Assassin because again, he’s fat and slow. Just try and attack from the side and behind.
Floyd: Easier than Ptolomey. Stick to the boat to gather clams and watch out for the cages. This one didn’t take me long to finish, just practice and stick with it.
Daisy: Even easier then Floyd and probably the easiest recount. Take advantage of Daisy’s speed and large map. You can run circles around the AI here.
Toshiro: Now things get really hard. You’re gonna have to deal with Flip Floppers and Yard Signs back to back so be prepared. For both game types, I recommend going for the buttons and signs that spawn on the upper levels.
Hedwig: She sucks and her map sucks. She’s as slow as Ptolomey, so use the same tactics as you did for him. Clams come from the snowballs, so catch them on the way down. You can destroy the bigger snow balls for clams too. On the left side of the map is a stair case that takes you to a detonator, use this to start an avalanche. Use this to your advantage. Stay on the spawn platforms or the ski lift during an avalanche.
Moxie: I found this easy. It gives you all the soft ball game types and the AI are really dumb on this map. They fall off constantly. Shouldn’t give you much trouble.
Murgatroyd: Unlike the first time around, it’s not all Photo Op. You do rotate the maps though. The only tough one here is the last one which is Mud Slingers. You should know how to win this by now, but there’s a switch on the upper floor that can unleash a tentacle monster that will grab anyone who walks in the middle area and kill them instantly. Use this to get rid of anyone going for your cut out.
Santo: Little tougher than Moxie, but also rather easy. You rotate maps like before, which is good because Santo’s map isn’t that great. Mostly softball game types like Moxie.
Crackers: 10 character assassins, one on each of the 10 maps, then political minefield on Crackers’ map. Luckily for you Crackers is the best character for this. When attacking, double jump and press X. Crackers will do a round house kick which the AI cannot block. This makes getting kills really easy. Watch out for Bean’s map, this one is really hard! I lost here about 5 or 6 times before getting lucky and beating it. I had no problems with the rest of the maps. Just spam the round house kick and other basic strategies.
Bean: The mother of all bullshit. This is without a doubt the hardest thing the game will throw at you. If you thought Crackers was hard while doing Animal’s Choice, this is an entirely different universe then that. Crackers is Avatar difficulty compared to this. I would rather do the entire rest of the game again then do this one recount again. This one has all 3 of the worst game types: Flip Floppers, Yard Signs, and then ends with A Clam in Every Pot. Tally Rally is no picnic on this either, so you have 4 really hard game types to get through out of the 7, with Political Minefield, Stench of Corruption, and Hack the Vote making up the other 3. There isn’t any special advice I can offer, just use everything you’ve learned up to this point and if luck is on your side you may just barely make it through this. One tip I can give is to make use of the switch that’s on the north side of the map. This does 1 of 3 things with the middle platform. It will either lower the whole thing into the acid, drop a barrel with a shit load of clams in it, or bring down the huge air tunnel thing that instantly kills anyone who gets caught in it.
If you’ve made it this far, congrats, you have completed one of the most difficult and praiseworthy games out there. Flaunt it, you’ve earned it.
6 Comments
You're the expert here... should this be marked as Buggy because of the fail once/fail forever issue?
By Sashamorning on 19 May 2013 04:19
Technically that would fall under missable, which it's already marked as such. That's also assuming that it's true, which we still don't know until someone wants to be the guinea pig.
By IXI FalcoN on 19 May 2013 13:31
See"Non Stop Party" for more details regarding primaries. For this achievement, all recounts must be won without losing a single round.


 IXI FalcoN
 TrueAchievements
 Khaos
Khaos