Halo: Combat Evolved Anniversary
44 Achievements
1,000
15-20h
Xbox 360
Xbox One
Xbox Series

Headhunter
Locate all the skulls hidden throughout the campaign.
50
How to unlock the Headhunter achievement in Halo: Combat Evolved Anniversary - Definitive Guide
All you have to do is work your way through this fantastic list:
SKULLS
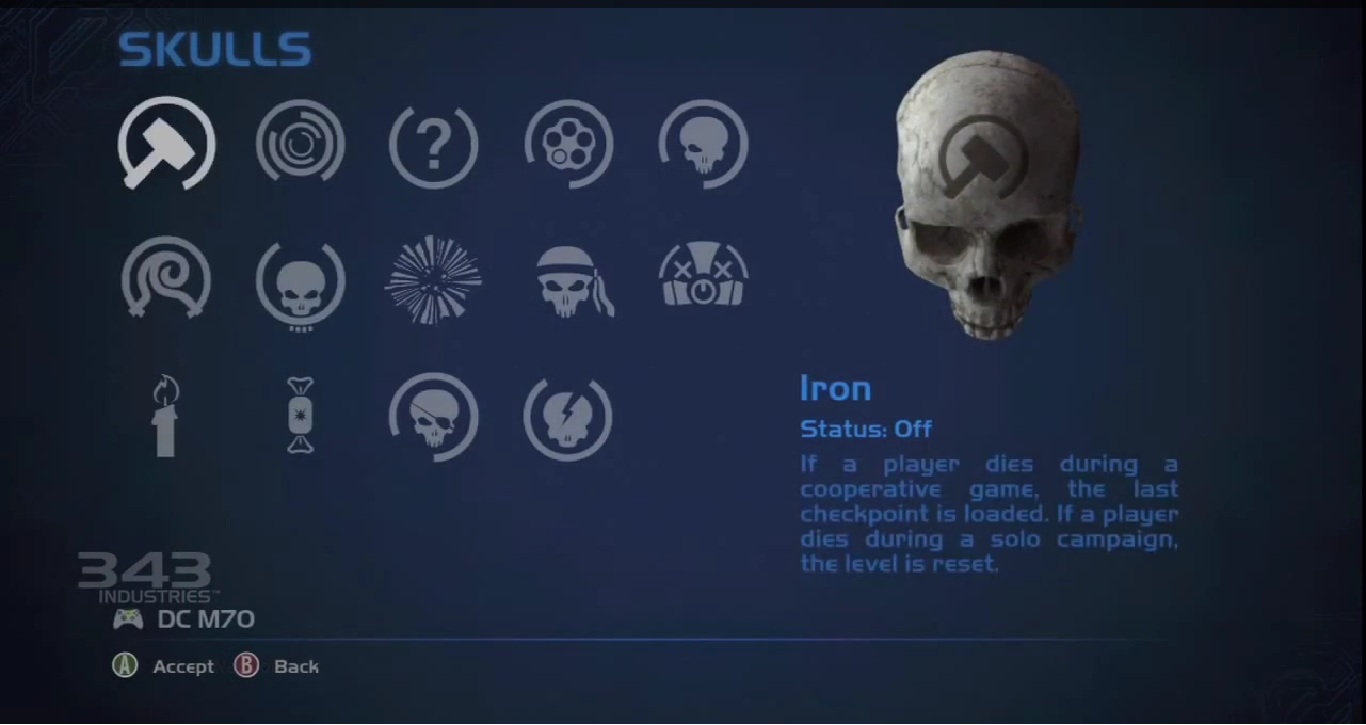
Iron
Level: Pillar of Autumn
Location: Located behind a blue ringed barrel at the beginning of the level.
Effect: Upon dying, resets the level in single player and reverts to the last checkpoint in Co-op.
Description: At the moment I'm unsure of what blue ringed barrel this skull is behind, but it's hard to miss. Just check all of them. I'll update this segment when I have a definitive location.
Mythic
Level - Halo
Location: Beneath the waterfall at the beginning of the level.
Effect: All enemy health doubles. All enemy sentinels have energy shields.
Description: Immediately after stepping out of the crashed drop ship, immediately turn right and head for the enormous waterfall. It will be there underneat the water. Fancy a swim
BOOM
Level - Halo
Location: Just before entering the underground tunnel.
Effect: All explosives double in blast radius.
Description: After having the warthog dropped off, proceed like normal, but instead of going down into the trench, go around the cliff edge on the right side and it should show up after a moment.
Foreign
Level - Truth & Reconciliation
Location: Behind the door that the 3rd set of hunters emerge from in the hangar bay.
Effect: Cannot pick up alien weaponry (covenant vehicles are currently unknown, but are presumed to be excluded due to Two Betrayals use of a Banshee.)
Description: When you enter the large hangar bay (the room with the large shielded openings that the Pelican uses to drop off marines) kill all of the enemies, but ensure you're close to the far right-side of the room when you finish them off. When the music suddenly picks up, be ready to go through the doors that open. Without an enemy near them, they won't open again. The skulls will be just inside.
Famine
Level - Silent Cartographer
Location: The top of the small plateau on the Beach
Effect: All weapons picked up will only have half a clip of ammo.
Description: From the start of the level, after exiting the Pelican immediately turn around and begin walking the other direction. You'll eventually come to a part of the island with a large piece of land right in the middle of it with a ramp going up the side. Scale it and the skull will be waiting at the top (Likewise, if you wait until after you activate the security console, the plateau will be immediately ahead of you as you exit the building. A scarab will now be crashed beside it.)
Bandanna
Level - Silent Cartographer
Location: At the end of the tunnel on the ceiling in the Security console building (Warning: Grenade jump necessary.)
Effect: Grants the player Infinite ammo in all weapons.
Description: Go into security building and head down the tunnel that leads to the control console. Go into the open room, than grenade jump on top of the structure to find this skull.
Fog
Level - Assault on the Control Room
Location: In the center of the room immediately before you set foot into the canyon. (Warning: Grenade jump necessary.)
Effect: Disables all players radars.
Description: After crossing the first bridge and taking the elevator down to the ground floor, the skull will be on a raised platform in the center of this room and will be surrounded by fog. It will require a grenade jump to reach it
Malfunction
Level - Assault on the Control Room
Location: On one of the pipes sticking out of the giant gorge in the large underground room.
Effect: Randomly disables one of the player's HUD features
Description: When you enter the tunnel and you come to the large room, you will notice pipes that stick out of the gorge in the middle on both sides. Not 100% certain which pipe the skull is on yet, but there aren't many to pick from. Will update this segment as more definitive information is made available.
Recession
Level - 343 Guilty Spark
Location: Located to the left of the Facility in a little drop behind a shade turret.
Effect: Every bullet fired costs 2 rounds in a clip.
Description: When you cross the fallen tree, you'll see a shade turret blow up and assault rifle fire coming from the structure. Instead of going inside, immediately go to the left and keep against the back wall. you'll come to a turet with a small drop behind it. Slide down the drop carefully and the skull will be waiting for you at the bottom
Black Eye
Level - The Library -
Location: In the back of one of the vents before entering the Index chamber for the first time. (Warning: Grenade jump necessary.)
Effect: Shields don't recharge on their own. Using melee on an enemy will recharge them.
Description: On the first floor at the beginning of the level, you will notice squarish openings in the ceiling that the flood use to enter the level. Before entering the round, yellow room, find the vent closest to that door and do a grenade jump into it. The skull will be waiting for you.
Eye Patch
Level - The Library:
Location: Behind the Index on the final platform.
Effect: Disables Auto-Aim.
Description: Instead of running onto the platform to grab the Index, instead go around as far from the Index as you can. The skull will be waiting on the ground right behind it.
Pinata
Level: Two Betrayals
Location: On the snowy ledge directly above the exit to the underground tunnel.
Effect: Meleeing an enemy makes them drop grenades.
Description: In AotCR, there will be a wraith tank on it as you're entering the tunnel. This time, get to the end of the level and grab the banshee, than fly back and land up there to grab your skull.
Grunt Birthday Party
Level: The Maw
Location: On a railing near where Foehammer is shot down.
Effect: Headshots cause grunts to explode into a shower of confetti!
..............................................................
QUICK NOTE TO TOUCH ON!
For Skulls and Terminals, if you play co-op online, the 2nd player will not get credit for collecting half or all of the items unless you do 1 non-stop playthrough. The game does not make a save file on the second player's console so it does not keep the progress once they disconnect or power down their console.
..............................................................
Credit goes to Jason Burt on Planet360 for the text.
Sadly, we did have a video to go with this, but it was unfortunately removed from youtube by user VGMMDI
25 Comments
That Bandana skull is tough!
By JAYMATiK on 18 Nov 2011 04:26
I hate grenade jumps :/
By Kiwi Soldier on 18 Nov 2011 12:22
All collectibles in order as they are found
Timestamps for the Skulls in the youtube description to make it easier...
13 skulls and 10 terminals
Easy to follow guide.. Hopefully.... Any questions message me here or on youtube and il do my best to try and help...
Timestamps for the Skulls in the youtube description to make it easier...
13 skulls and 10 terminals
Easy to follow guide.. Hopefully.... Any questions message me here or on youtube and il do my best to try and help...
5 Comments
This is awesome! I don't have to keep switching to watch a video for skulls or terminals! Just watch this one and your done!
By Templar Punk on 22 Nov 2011 11:17
Glad you like it and yes i did make the video and happy it helped you
By SSCP on 22 Nov 2011 22:26
If you have any trouble with Bandana skull and the grenade jump so please try this.
I founded on you tube and this is the best and easiest way ever. It tooks me 10 minutes, no worries with grenades and jumping and all that stuff ... :-)
*all rights on this video are by gurnitz!*
I founded on you tube and this is the best and easiest way ever. It tooks me 10 minutes, no worries with grenades and jumping and all that stuff ... :-)
*all rights on this video are by gurnitz!*
12 Comments
Sweet trick thanks. thumbs up
By EggBigot on 16 Dec 2011 12:23
thanks worked a treat i got on 2nd go (i didnt crouch jump first time)."simples"
i am rubbish at grenade jumps and had already died a dozen times
i am rubbish at grenade jumps and had already died a dozen times
By scotwolf2 on 10 Jan 2012 12:42
*REMEMBER, NO SKULLS OR TERMINALS CAN BE COLLECTED IN "CLASSIC" MODE*
All 13 Skulls Location;
Here is an easy way to get the Bandanna skull:
The best way so far getting this skull is using rockets that you find outside by a pelican on the beach but only after you pressed the security door button. You can try and Rocket Jump up to the skull. You'll need an overshield as well for this, the over shield are outside the door. If playing in co-op, your partner can commit suicide once you're up top so he/she can spawn next to you and get it as well. (Please see first video)
- The Pillar of Autumn --
• (0:00) Iron Skull - At the start of the level, as you awake from the cryo-stasis container, search the area behind the cryo container. It's behind some crates at the back of the room.
• (0:17) Terminal 1 - When you first enter the bridge, this terminal is located on the left hand side of the bridge opposite Captain Keyes at an unmanned computer station.
-- Halo --
• (0:29) Mythic Skull - As soon as the level starts and you land on Halo, you'll see a large waterfall directly ahead of you. Search the base of the waterfall and you'll find the skull around some rocks to the right.
• (0:46) Boom Skull - After you receive the Warthog for the first time, keep driving until you see an entrance to some underground tunnels. Before entering, look above to see some pipes. Scale the cliff edge to the right to find the skull.
• (1:11) Terminal 2 - After you receive the last skull, enter the tunnels with the Warthog. Head all the way down until you need to jump a gap to continue, don't. Continue on and take a left downhill and you'll see the terminal in a dead end corridor.
-- Truth and Reconciliation --
• (1:32) Foreign Skull - Check behind one of the one-way doors from which the enemies spawn from.
• (1:46) Terminal 3 - Found on the Covenant Bridge, you walk through this room twice so it's hard to miss. Go up and get it the first time to avoid confusion.
-- The Silent Cartographer --
• (2:03) Famine Skull - Once you clear the first set of enemies on the beach, turn around and face the ocean. Now follow the path right and you'll see a small plateau. Search the top of it to find the skull.
• (2:35) Terminal 4 - It's at the base of the circular structure where you fight two hunters in the middle of the map.
• (2:58) Bandanna Skull - This skull is located at the end of the first facility. The best way so far getting this skull is using rockets that you find outside by a pelican on the beach but only after you pressed the security door button. You can try and Rocket Jump up to the skull. You'll need an overshield as well for this, the over shield are outside the door. If playing in co-op, your partner can commit suicide once you're up top so he/she can spawn next to you and get it as well. (PLEASE SEE BELOW VIDEO!)
-- Assault on the Control Room --
• (3:36) Fog Skull - In the patrol room, before you head outside again onto the battlefield, search the vent in the center of the room, grenade jump required. Your partner should commit suicide to spawn by you if playing in co-op.
• (4:04) Malfunction Skull - When you reach the gorge, you'll see ladders leading down to lower platforms, jump or climb down to get the skull.
• (4:22) Terminal 5 - At the base of the final snowy battlefield. Climb down the large pyramid, turn around at the bottom and you'll see the terminal in the hole.
-- 343 Guilty Spark --
• (4:48) Recession Skull - Check behind the first shade/tree you see in the swamp, at the start of the mission. Follow the video strictly for reference as it's hard to see.
• (5:19) Terminal 6 - *MISSABLE* Located on top of the final doorway of the facility. When leaving on the last elevator, jump off at the right time to get to it. Make sure you don't ride this all the way up or you may have to restart the level.
-- The Library --
• (5:34) Black Eye Skull - From the start of the level, walk around until you reach the 3rd set of vents, just before you enter the index room for the first time. It's in the right vent; you'll need to grenade jump.
• (5:56) Terminal 7 - On the third level of the library, you'll come across a large circular room with no elevator. Jump around the sides to reach it. You should be able to see it before going to get it.
• (6:19) Eye Patch Skull - Avoid the index on this floor and walk around the edge of the room. It's in-between 2 crates. If you go into the index, you will miss this.
-- Two Betrayals --
• (6:48) Terminal 8 - This terminal is directly opposite you at the very start of the level, hard to miss.
• (7:05) Piñata Skull - After you capture the last Banshee, fly back past the third generator room, then back to the tunnel. It's on the snow hill above the tunnel opening where you came from.
-- Keyes --
• (7:39) Terminal 9 - When you reach Captain Keyes, search the lower walkways underneath him, but clear our the area first.
-- The Maw --
• (7:53) Terminal 10 - Upper cryo-storage room. Climb the ladder to the platform and enter the room in front of you. Search the nearby computer panels for the terminal.
• (8:08) Grunt Birthday Party Skull - Use your Warthog to climb up on the railing where Foehammer goes down near the end of the mission. The timer stops here so it's another hard to miss skull.
Credit goes to Steve from LifeStyleGaming his txt guide and videos and DarkHawkGaming for rocket video.
I made a video on how to grenade jump to the Bandanna Skull. Getting across is all about the grenade placement. Hope this helps. Any questions you can message me here or on my Youtube channel.
I made a video showing a trick that my friend found and helped me get the skull with. A whole lot easier than the normal grenade jump.
Credit to DemonKingZoma and DRAGON X1239
Credit to DemonKingZoma and DRAGON X1239
I put together this video to show where all the skulls are in halo anniversary i also have a terminal guide on my channel. enjoy
Terminals and skulls are Halo's version of collectibles. Collect certain amounts of the terminals and skulls and you'll get an achievement. For their locations, refer to this thread.


 Kiwi Soldier
 TrueAchievements
 SSCP
SSCP
 User has been removed
 A Batwoman

 BigJake901
 PredatoryOrphan
 OtakuPaul
 DarkReign2021