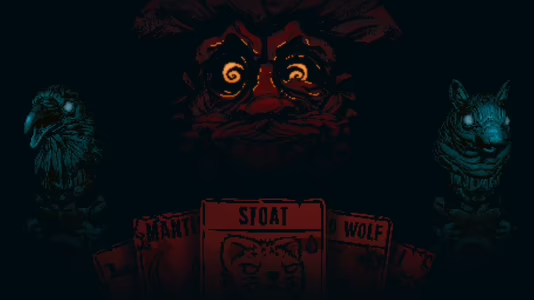
Inscryption
40 Achievements
1,000
40-50h
PC
Xbox One
Xbox Series
Doomed Necromancer
Complete the Temple of the Dead. Details for this achievement will be revealed once unlocked
20
20.9%
How to unlock the Doomed Necromancer achievement in Inscryption - Definitive Guide
 pennysticks
 The Temple of the Dead is located at the bottom right and is one of the two Temples you can access at the beginning of Act II. Upon entering, you wil see the boss, Grimora, trapped behind three gravestones. You will need to piece together what happened to the three skeletons in the room and battle them in the process before you can access the boss. Along the way, open any caskets you find and any passageway that opens up for you and the well you gain access to you for card packs and epitaph pieces.
Once you have all nine epitaph pieces, you will need to line them up on the left, middle and right gravestones in order to remove them. The finished graves should read as follows:
Once you have all nine epitaph pieces, you will need to line them up on the left, middle and right gravestones in order to remove them. The finished graves should read as follows:
| Kaycee Hobbes 1970 - Winter 1992 | Sawyer Patel 1702 - Fall 1778 | Royal Dominguez 1589 - Spring 1632 |
| Hit by a falling piece of ice. | Eaten by a hungry dog. | Brought doen by scurvy. |
| The defibrillator failed. | Does not hold a grudge. | There was no cure. |
Grimora uses more advanced Dead themed cards, such as the Bonehound, the evolving Sarcophagus (that turns into a 3 attack, 3 HP Mummy Lord) and the Banshee but none of them hit too hard. The real trick is halfway through. She will wipe out any cards you have in play and turn them into zombies all with 0 Power and 1 Health! Play these out and you will get control of your deck again. If you are in control of a good deck, this fight shouldn't be too difficult, but I found getting warmed up to the fight with the right deck took a few attempts before I got it.
You can always jump right back into the fight if you lose, and there are plenty of packs of cards to find in both the Temple of the Dead and the Temple of the Beast if you need better options. Don't miss out on the clover next to the dock in Temple of Beasts area for a re-roll of your deck if you need it.
You may also want to take a look at Dark Offering once you have battled the skeletons and Grimora, but you will likely need to collect a few items in order to finish off that trophy later.
If you would prefer a video walkthrough of this section of Act II, you may use the following video linked below. Please keep in mind, the below video contains some visual spoilers regarding the look and feel of Act II:
You can always jump right back into the fight if you lose, and there are plenty of packs of cards to find in both the Temple of the Dead and the Temple of the Beast if you need better options. Don't miss out on the clover next to the dock in Temple of Beasts area for a re-roll of your deck if you need it.
You may also want to take a look at Dark Offering
If you would prefer a video walkthrough of this section of Act II, you may use the following video linked below. Please keep in mind, the below video contains some visual spoilers regarding the look and feel of Act II:
 Feonyx
  TrueAchievements
TrueAchievements
In Act 2 head to the bottom right graveyard.
Click on all the tombs, fight all the ghosts and click on all the buttons to get Epitaph Pieces.
Once you have all NINE epitaph pieces, you will need to line them up on the gravestones in order to remove them. The finished graves should read as follows:
Kaycee Hobbes 1970 - Winter 1992
Hit by a falling piece of ice.
The defibrillator failed.
Sawyer Patel 1702 - Fall 1778
Eaten by a hungry dog.
Does not hold a grudge.
Royal Dominguez 1589 - Spring 1632.
Brought down by scurvy.
There was no cure.
Defeat Grimora
legendaryjman Story related, can not be missed.
The Temple of the Dead is located in the bottom right corner of the map. The scrybe is Grimora. To reach her you have to place the correct name, cause of death, and empitath plates on the tombstone in front of her. The plates are laying around in the three rooms inside the tomb, they are not hard to find. The skeletons give you clues on where to place the plates. Here is the solution:
Phase 1:
She will play the Banshee (1/1 Airborn sigil), Bonehound (3/2 Guardian sigil) and Sarcophagus (0/1, will turn into a Mummy Lord (3/3)). She repeats the same cards in the same location until you beat you.
Phase 2:
She starts by killing all of your active cards and giving them back to you as 0/1 zombies. The sigils on your cards will still be active, so if you had a Field Mouse it will still create another Field Mouse when you play the zombie version. She will play the same three cards, but will also play Zombie (1/1) cards.
The Temple of the Dead is located in the bottom right corner of the map. The scrybe is Grimora. To reach her you have to place the correct name, cause of death, and empitath plates on the tombstone in front of her. The plates are laying around in the three rooms inside the tomb, they are not hard to find. The skeletons give you clues on where to place the plates. Here is the solution:
- Left Tombstone: Kaycee Hobbes - Hit by falling ice - The defibrillator failed
- Middle tombstone: Sawyer Patel - Eaten by a hungry dog - Does not hold a grudge
- Right Tombstone: Royal Dominguez - Brought down by scurvy - There was no cure
Phase 1:
She will play the Banshee (1/1 Airborn sigil), Bonehound (3/2 Guardian sigil) and Sarcophagus (0/1, will turn into a Mummy Lord (3/3)). She repeats the same cards in the same location until you beat you.
Phase 2:
She starts by killing all of your active cards and giving them back to you as 0/1 zombies. The sigils on your cards will still be active, so if you had a Field Mouse it will still create another Field Mouse when you play the zombie version. She will play the same three cards, but will also play Zombie (1/1) cards.
Rqsb_  PSNProfiles
PSNProfiles
We cannot show the content due to copyright protection. Please click the link below to view the guide.