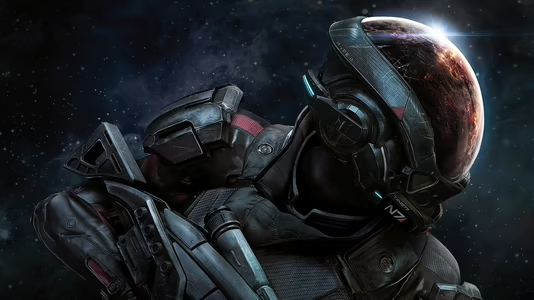

Mass Effect: Andromeda
55 Achievements

Unwavering
Complete an "Insanity" single-player game, or 5 "Gold" multiplayer extractions from any firebase.
How to unlock the Unwavering achievement in Mass Effect: Andromeda - Definitive Guide
 OrphanOfSoss
 TrueAchievements
TrueAchievements
First of all, I did this on NG+ after a very lengthy first playthrough. I came in around level 45-50 with plenty of skills and gear. The following things carry over from playthrough 1 to NG+:
-All of your credits
-Everything you've researched in the terminal (not your research data but the things you have already researched)
-Your current inventory
-Your (and your squadmates) skills (Make sure you put one point into locked skills such as Remnant VI and your squadmate's loyalty skills if you want them to stay unlocked)
-Nomad Upgrades
The Steps
The following are the only required steps you need to do in the story in order to beat the game, the BARE MINUMUM. This is not a completionist playthrough guide, it's a minimalist. If you want to do more, be my guest:
1. Complete Habitat 7
2. Talk to Tann and SAM on the Nexus
3. Complete Eos (drop zone part then 3 monoliths and vault)
4. Talk to Tann and Addison on the Nexus
5. Go to Aya and talk to Efvra
6. Do the story quest fr Havarl or Voeld. I beliebe Havarl's is shorter. I just used Tac Cloak and ran past all the enemies in the jungle.
7. Rescue the Moshae on Voeld (this was imo one of the hardest missions in the game)
8. To to the vault on Aya with the Moshae.
9. Do the interrogation on Kadara (being nice to Sloane) then go do the transmitter quest.
10. Complete Hunting the Archon. (I personally saved the Salarian because she helps you during the final boss fight)
11. Do the quest on "Meridian" (another hard one)
12. Investigate the anomalies in different systems to triangulate the position of Meridian
13. Return to "Meridian" and fight your way to the end
My build
Personally, I played through the game as a Sentinel I thought it made most encounters fairly easy. I crafted Remnant Heritage Armor for its protective purposes and used the Hornet Pistol and some random assault rifle through the whole game.
Sentinel 6 profile
As for skills, in the Biotic Tree:
Charge rank 6 (just for points in Biotics)
Singularity (Same but can be useful)
Lance (my bread and butter, baby. Spec so that it has no cooldown and uses shields instead. Rank 4 top, rank 5 bottom, rank 6 bottom)
Barrier (Rank 4 and 5 bottom, Rank 6 top)
Offensive Biotics (Top, bottom, top)
Containment (Bottom, Top, Top)
Skills in the Tech Tree:
Overload (the skill I use first before Lance, Top bottom bottom)
Incinerate (Used in certain sections of the game, is pretty useful. Bottom bottom top.)
Tactical Cloak (saved my ass so many times. Use to revive allies or run by optional shit. Top x3)
Remnant VI (This little dude puts in serious work. Top bottom bottom)
Team Support: Bottom, top, bottom
OFfensive Tech: Top top bottom
Auxiliary Systems: Bottom bottom top
Play style and specific instance advice
Pretty much any encounter I got into I would try to quickly weed out the weak, non-shielded enemies as quickly as I can. Typically Overload > Lance, Lance is enough t take out any nonshielded enemy. Cast Remnant VI whenever you can because he will zap enemies with his electric beam and prime them for a Lance detonation Also hit Up on the d-pad to make your squadmates target the same enemies as you. There were instances when I switched to Tactical Cloak to heal my allies or just get away from bad shit (mostly boss fights). There are a couple instances where Tac Cloak can let you run by enemies (Havarl jungle and certain parts of the remnant city quest)
Troublesome enemies:
Remnant observers: Quickly dispose of these assholes or you will regret it. Their long rnge guns are annoying.
Remnant destroyers: Just use a Cobra RPG. Not worth it.
Kett anointed: Kill these asap or their gatling guns will shred you
Kett ascendant: Stay away from them or they can grapple insta-kill you. Kill all ther enemies in the area then focus on them. Try to chip away at the orb's health then combo detonate the fuck out of him
Kett berserkers: Just stay mobile and try to kill all the other little dudes first, then gangbang this fool with combo detonations
Fiends: Stay mobile and kill little guys, these arent too hard as long a they dont catch you off guard.
Boss Fights:
The Ascendant boss fight (The Cardinal?) on the Moshae rescue mission is a pain in the ass. Try to stay mobile but sticking to cover to kill the enemy waves and fuck up the boss when you can He takes a while but you will get there. Don't let him grapple you..
Berserker on Archon Flag Ship: Not too hard. If you stay in the lower area he will often get stuck down there. Kill the random guys that spawn then focus on him again.
Archon's Sword: Holy crap this one gets crazy. Stay mobile and try to kill little guys asap while also avoiding the Sword. There is an area in the very back of the level I hid a bit to make this easier. When the fiend shoes up try to separate him from the boss and kill him first.
The Archon: Take your time and clear the enemies, being safe and avoiding the architect AOE attacks with a quick dash out of the way. The game checkpoints in between each interface so this isn't too bad. You can find pretty decent hiding spots during the parts where you have to wait for your sibling to expose the nodes. You really don't have to fight during those parts, just avoid the architect. Watch out at the second node because the architect gets a gatling gun that will melt you if you don't stay in cover. The second node was the hardest of the three, I kept jumping back and forth between cover and picking enemies off in between. Once you've crossed the gap your allies will show up and make the final part a breeze. Congratulations, you've done it!
If you have any questions, or if I've left anything out, please let me know in the comments. I know the formatting is a little sloppy, but I'm tired and this was long lol

 Xenolith666
TrueAchievements
TrueAchievements
So you're looking to get 5 gold extraction medals online; you can do this with friends or randoms online. As long as you escape and earn the medal you will get credit. Should a member of your team not make it out, it won't count against you. Playing MP, leveling a character and finishing 5 gold missions can take you anywhere from 10 to 15 hours to complete depending on your skill level. It took me just under 11 hours to complete. You will obviously earn other achievements along the way to doing this one. You can not earn this by sending strike teams out on Gold missions.
Step 1: Choose a character and stick with it. Choose a character that fits your playstyle and level it up as quick as you can. Use XP boosters whenever you get them from packs and any other boosters that will help you in matches; Disruptor ammo is very helpful against shielded enemies. Once you reach level 18-19 you should be well equipped to survive gold level missions. I personally used a Human Adept which is full Biotic.
Step 2: Matchmaking: Whenever I was searching for a group I would try and get into one with players that had very high Apex ratings. At least 2000 or higher; if I'd come across a group with a couple 5k's in it, I would ready up.
Sometimes the level of the character does not matter! On one such occasion there was a 5k+ Apex rating player using a level 7 Krogan Vanguard and they handled themselves very well. On the reverse side, if it was a level 7 with a 500 Apex rating, I'd probably avoid that player.
Step 3: Pay attention to what the match is! Obviously gold.. but not only that, who you're fighting! If the match is set for "Kett", I'd say avoid it. The Kett are extremely difficult on Gold difficulty since they have numerous characters that can KO players with one specific attack, like the 'Ascendent' or the 'Fiend'.
I'd say the easiest set of enemies to deal with are the 'Outlaws'. All 5 of my gold runs were against 'Outlaws'. The only real threats are the 'Hydra' or 'Berserkers'. A well placed Cobra RPG shot will drop them below half health while annihilating anything else nearby; so keep that in mind. The map shouldn't really matter.
Step 4: Be a team player! The only other advice I can give is to not try and lone wolf it out there. You have a team of 4, try and stick near a teammate or two so you don't get overrun by enemies. Enemies come in waves and combining your powers with your teammates can make short work of small groups. Utilize choke points in the map like doorways or hallways. Stick and move if you're overrun by a large wave of enemies. Always keep in mind where ammo refill stations are should you need them!
Hopefully this helps some, the only reason I went with the MP first is because I just didn't feel like playing MEA on Insanity difficulty. This also wasn't meant to be the fastest route to a 1k completion of the game.
 Alice2183
TrueAchievements
TrueAchievements
I start with the Infiltrator build so that you begin with Tactical Cloak, which is extremely useful. My build will basically be an Engineer with a few points into some combat skills. I will give advice on where to spend your skill points throughout, but basically, I will be using Incinerate, Overload, and Tactical Cloak the entire time as well as putting points into Combat Fitness and Assault Rifles. Any extra points you have are gravy and can be used to upgrade things like Barriers and Tech Powers.
I will be going through this with almost bare minimum skills, so anyone watching will likely be a higher level than me. I will only be showing the main missions and a few of the Loyalty missions (Vetra's, Cora's, and Peebee's, done only to upgrade skills if you aren't doing this on NG+).
The rest of the videos will be under a spoiler tag.
Chapter 1: Habitat 7
 Seeker74
TrueAchievements
TrueAchievements
Start by choosing if you want to change anything about your character and then choose Insanity. Off we go. You keep all of your strike teams, your researched items (but not points), your skills as assigned, all of your money and all of your inventory. The inventory can be an issue if you had the upgrades to 200 before and now the limit is now 100 items. Consumables can still be picked up from containers. You can recycle items you cannot hold, but mods don't give you anything.
Prologue
The weapons you are given during the prologue are level X (you have to be level 80 to make your own X), which is a good thing. You still have your profiles, but you will be using a pistol for a while and then you'll get an assault rifle and a sniper rifle later. The enemies in the early tutorial don't move much. The Remnant VI helps a lot, but it can die a bit fast if you don't support it. It's always good to have it as one of your team, regardless of the other powers you choose. The cloaking Wraiths will come to find you, but melee attacks work wonders. The big fight by the shuttle takes place near both an ammo box and a health/shield box, this makes it much easier. The shuttle makes good cover, too. In the area where you follow your dad, just take your time. He's not going to die or anything, but if you follow him pretty fast it does avoid some fighting. Your squad does a pretty good job of taking down the enemies from the suggested positions when that part comes. Go ahead and run to your dad when he asks for your help, it ends the battle right away.
You have to go get your ship before you can get to the next planet. It's up to you how much time you take with the various missions in the Nexus area, but you will be coming back here a lot and you don't want your map clogged up with little polygons. You only need to complete “A Better Beginning” to get onto the Tempest. Go to your quarters to pick up your special orders and color your outfit. Research anything you need and go to the med-bay to respec your powers (getting all the passive ones to rank 6 helps a lot, especially Barrier) if you want to. I suggest the Black Widow Sniper Rifle (penetration mod is a must) and the Dhan Shotgun (crafted with Vintage Heat Sink and then damage bonus mod works well) for your weapons. The Maverick Deadeye (Skirmisher is the blueprint name) Armor works well for an Infiltrator build, but the Remnant armor is excellent for shields and health regeneration if you want to go with an Engineer profile (Lance, Cloak and VI are a good combo.) Another option is the Kett Unity set for bonus damage. The best armor in the game, in my opinion, is the Heleus set. You get the helmet after the first playthrough and the recipe for the other piece (which covers your arms, legs and chest) will be added to your research. The main issue with this set is that it costs several thousands of Heleus Research points to research all the way up to level X, though it only costs a small amount in terms of resources to develop it. The only mods available for armor are Fusion and they all have a downside. I would wait until you can get a cryo point to cut the penalties in half. It's a good idea to always have Cobra RPGs in your consumables. Cora and Drack are the best support I think, but you have to complete Eos to get Drack. In the meantime, Liam has the Overload skill, which is quite helpful against the Remnant. If you respec and lose your Remnant VI, the mission path to get it back is not very long but you'll need to wait until further into the game. It's a good idea, for maximum efficiency, to scan systems as they become available. The results add up, and it goes toward your progression percentage completed on the galaxy map.
Eos
Be aware that you won't be able to advance the “First Murderer” mission or the “Ryder Family Secrets” mission very far until you have made the planet viable. This is something you will probably want to do to 100% on all five planets, unless you want to avoid all unnecessary battles. Vaults and outposts get you most of the way there. There are also a few areas that will nearly kill you, even in the Nomad. You actually have to get to the point in “A Trail of Hope” where the new planets are open to you (near the beginning) to get rid of most of the radiation areas.
For the little fight at the beginning, the top of the ship is actually a good vantage point. Once you get the Nomad, you are led to the first monolith and there is a bit of combat there. Concentrating on the Assemblers is a good idea, they will keep making more enemies if you don't. Meet Peebee. She will follow you around and make comments, but you cannot add her. The closest monolith is south, but you need to go around the lake to get there. There are Kett guarding the area, so be sure to activate the nearby Forward Station and save manually just in case. Forward Stations are life savers. If you need to redo your loadout, or head back to the ship to respec your powers for some reason, they are like a bookmark of where you were. The ramp to the right gets you up there, going up next to the monolith just gets you an “out of area” reset. Your squad likes to get killed here, the minigunners make sure of that. The area is huge, so just keep shooting. Drack shows up after the Kett are down, but you cannot add him to your squad either. After you activate the monolith, the next one is west. You will pass Kett and Remnant fighting, the radiation is too hazardous to join in. Zoom on by toward your goal. The next Forward Station is through a cave and the future home of your outpost is nearby.
The road leads right to the last monolith and the area is radiation shielded. The Remnant are dormant, so take advantage of this and get a shot off before they register you as a threat. There are a lot of them, the area is tiny, and you have to keep moving. The shotgun is more useful than the sniper rifle in close quarters. Take out the few Kett after you solve the monolith.
Now it's time to head for the vault. The giant room is your first Remnant battle here. They are not hostile until you are, so choose your first shot carefully and stay on the platform you start on. Next battle, stay near the bottom of the ramp so that they have to come to you. The next battle takes place in close quarters with Observers, staying outside the door is best. There are small battles in the big room leading to the final door, but none in the purification room. Once you activate it, follow the waypoints closely. Getting lost means pretty instant death.
Help Drack with the Kett that are at the outpost site. As tempting as it is to shoot at them from above, near the Forward Station, you cannot. Choose military for your outpost to get more support at the end of the game. You end the cutscene outside of the safe area, so hurry and fast travel to the Tempest and complete “A Better Beginning” once the next scene is over. Don't forget to complete the “AVP Cryo Deployment Perks” mission so you can get bonuses and things. You cannot get the one that cuts down the penalty on Fusion Mods yet. For the next priority, you only NEED to complete one of the two planets, but you will probably complete both just because you'll be going to both planets since you really need the Asari and Turians to help you at the end of the game.
Havarl
Go ahead and advance as many missions here as you want. “Helping Havarl's Scientists” is your main goal. Jaal will meet you at the location if he is not in your party. Havarl, in case you haven't noticed, is small yet full of enemies. Try to avoid as many as you can, but there are plenty of cover opportunities against the ones you cannot. The area near your main goal starts with a Remnant battle, but you can see them from pretty far away and get the drop on them. Once you talk to the person you first met here, you are done with the planet part of the major quest you came here for.
“Turian Ark: Not Dead Yet” opens up, I suggest you do it, the battle is not hard with the Turians helping too. It's a good idea to go get the memory, once the first wave is down, and then battle from that side since the reinforcements will come in where you just were. Anything else you want to do here will take a lot more time and a lot more fighting. Don't worry about the debris mission here, that's secondary and not related to the Turian Ark.
Getting the third monolith, the first one is already on and the second one is where you found the scientists, is a long-drawn-out process. Getting the vault going does get you some AVP for perks, of course, which makes it pretty worthwhile. “A Dying Planet” has a few small ambushes, but it's mostly puzzle solving with consoles at the beginning. Once your goal changes to an area in the north, there is a big battle between animals, Remnant, and Roekaar enemies that you will come across on your way there. Once you get inside the building, there are some Remnants that attack when you open the three doors. The one straight ahead is blocked, but if you look at your map it didn't go anywhere to begin with. The left side leads to a dead end, that is the exit once you get the item you came for and you have to go all the way around to get it. The door on the right leads to a hallway of enemies, you can peek around the corner for the most part to stay safer. At the bottom of the ramp you will face some Assemblers and a Destroyer. Concentrating on the Assemblers first is a good idea. That way, you can use the surrounding cover to take down the Destroyer. The next battle has two Nullifiers that attack with beams that will knock you out of cover. The console in this room allows you to reach the top of a column with some fancy jumping. Once you get the item and get outside, use the FS in the ditch to save some time. Head up to the edge of the ditch and a bridge comes together to allow the enemies to come after you. Cross the bridge partway and use the boxes for cover against the rest of the Roekaar. The wide area after the door is full of enemies and the outpost at the end has a battle between animals and Roekaar. You can wait for them to narrow each other down if you want. Once you talk to the guy, use the FS in the ditch again to get pretty close. Of course, by the time you get there he's already arrived. When you get to the bottom, go grab the memory for the other mission and then activate the console. You have to leave the cave before you can fast travel to the camp FS. Some animals and a few Observers are all that stand between you and the vault. The power console also attracts Observers, but a turret that you can turn on is on the top area. After that, activate the consoles in order of the light orbs they have. Trigger the purification, wait tensely for the door to open again and then quickly ignore the Remnant to hit the console. Use the FS nearest your goal to complete the mission.
You should have a mission notification to read an email for “Cora Harper: Asari Ark” by now. Go ahead and head back to the Tempest and advance that mission on Eos then head to Voeld. Talk to Evfra, because the priority mission takes place on Voeld.
Voeld
Voeld, as they said in that video, is cold. You cannot do much of anything until you advance “Meet The Resistance,” so move fast (I mean it, you can die before you get to the heater) and you will find a safe spot soon enough. Once you meet the lookouts, you can use the Nomad to do whatever you want while you are here. I suggest you go activate the monoliths and the vault. Making the planet viable helps warm up the cold a bit, but it's still pretty hazardous. The north monolith is activated by going toward the monolith itself and then looking down to find the area where the console is. The glyphs are pretty easy to get to and there are no Remnants here. The southwest one doesn't have a battle either, the console in is a cave. Two of the glyphs for the last monolith are on a block outside near the monolith and the other one is on a block inside a nearby cave. The vault is not near any Forward Station, but not too far away. Be careful of the electrical fluid on your way in. The console you activate will pop up some heaters, though there is a chance if you die from the cold there will not be a hazard when you respawn. If you are in hazardous conditions, you need to go from one heater to the next. If you don't mess with any other consoles, the path to and from the purification console is open. You only need to fight some Remnant to activate it. There are some on the way out too, but it is easier just to Cloak and run to the other console.
“Stage A Rescue” is made easier by the fact that released captives help you fight. The area is huge and there are a lot of heaters around, near the cells mostly. Releasing the captives during the first battle means only one wave of reinforcements, though that includes two Anointed chain gunners.
“Meet The Family” leads to the next mission I suggest you complete.
Your goals for “Remove The Heart” are far apart from each other, but the main goal is not far from a FS and the optional goal is not too far from where you are now and there is a FS near that location that, if you get it activated, will be useful to get back to that area once this mission is done. Just get close enough to the shield to trigger the dialogue, don't stick around for the big gun to hit you. Be careful where you drive on the way to the side entrance, falling off the edge and having to get back up there is annoying. Save at the heater just inside the cave entrance, then fight your way through. The area by the shield is a bit hectic, but you can do it. Stand by the shield for a moment to make the nearby console active and keep going. A few Chosen on a ledge are easy enough, and one Wraith comes to you. Fight a few more and then stay on this side of the bridge, using the heater as needed, to take down the Kett in the distance. Once inside the main area, keep moving and you will get them all eventually. The optional goal, which is not marked, is in the orange lit room that you can see from the room with the two upward staircases. That turns off the turrets and opens two supply rooms, but beware the Kett coming in to defend their stuff. If you get cold, go back into the room for heat. Go activate the consoles and then head down to the Hangar Bay. You can fight the first few Kett from the doorway. Except for a few Wraiths on the way down the ramp to the next door, it's pretty clear for a bit. Clearing the Kett while triggering various consoles takes a bit. The boss, The Prefect, shows up once you are ready to leave the area. He's got a shield and an orb. He takes a bit of time to get him down. I suggest avoiding his attacks so you don't need your shields and using Lance on the orb and your shotgun on him. Head up the elevator to the end and some stuff. You probably have a complete set, or more than one, of Kett Unity X armor now. It's good for bonus weapon damage, but it concentrates on Combat power and of course you sacrifice all the protection bonuses from the Remnant armor I suggested you make. Buxil awaits you outside by her shuttle and tells you to go investigate the shielded area from before.
“Uncovering The Past” begins at the formerly shielded city. I saw a few red dots on my radar on the way to the cave, but nothing attacked me. There are heaters in the crevice on the way into the cave and Kett inside. Once you get all the way in, you have three choices. I suggest you save the AI and give it to the Angara to provide help at the end of the game. You can fast travel from here if you change layers on your map.
If you want to run around some more, “Frequency” is not too far from “Resistance Trap” (it pops up as you go by) if you want to knock out both of those for more planet viability. “Frequency” is all animals but no heater and “Resistance Trap” is a bit challenging with only one heater in the area.
Finding the Asari Ark, after the first waypoint, could have you running all over the place if you didn't know it is on the right side of the map close to what looks like a brown river. It leads to a very difficult Kett battle. Backup Life Support should help against the cold, but it's glitched. Even if you didn't bring Cora, she shows up anyway.
Continue with “A Trail of Hope” by heading back to the Resistance headquarters FS and then walk all the way through it to the other side. The people you meet are in a cold area, so sprint to them when you pass the last heater. They will help you fight. You end up with Jaal in your party, whether you want him or not, so keep Peebee or Drack (Cora is OK for shield regeneration and maybe health regeneration if you specked her that way in your last playthrough) for your other choice. Once you get inside, don't jump down from the area you start in. You can do a good job taking the enemies out from the doorway. The enemies attack in small groups, and even the Destined aren't too bad. Once you get to the Exaltation room, there are mainly Destined but still not too bad since they don't close in much. You just have to avoid the grenades. In the final room, cloak and run out the far door to the donut platform (if you fall in you pop right back up) and then take out everyone else before you worry too much about the Cardinal. She takes a while, but she's not that dangerous if you watch his attacks. She likes to summon friends, which just makes it take longer. Save the facility (for Angaran support later), and spare her life if you are feeling nice. The Moshae talks tough, but she still helps you get along with the story. After that, run to the shuttle pad and fight from there. As soon as the shuttle lands, you can leave even if there are still enemies.
“Know Your Enemy” becomes available now, go ahead and do it. The first base is not too bad, the building is warm if you need life support. The second base has a heater on the ridge that you can stay next to.
Kadara[
Shortly after you get to Kadara, after you talk to the prisoner, you should get updates for the Turian and Asari ark missions. Be very careful of the acidic water here. Fixing the planet here will remove the hazards from the water. It makes travel in the area much easier and makes the mission “Counting Bodies” a lot more manageable, if you are doing it.
“Healing Kadara's Heart” coincides with “The Outlaw Monolith” as you approach the closest one. One glyph is up high and two are down lower. There are no Remnants here. The next one is west of this one, be careful of the huge lake on your way there. You can accidentally find the console by falling into the cave from above. Help the Angara out and then the two glyphs are easily found near ground level. The third one is accessed from a nearby cave, east of the monolith, and defended by human raiders. The big robot at the end is a pushover compared to the Atlas in the last game. The first glyph is to the left near a uranium deposit before you climb the rocks. The second is on the right partway up and the other two are on opposite sides of the console on pillars.
The vault is near the scavenger hideout for “Safe Journeys.” If you don't have that FS yet, the closest one is probably the one nearest the outpost. When you get there, be careful of any animals that might have followed you. Inside, three consoles light up within red shields when the power is turned on. Thankfully, the shields turn safe once each console is activated. A few Remnant are inside and be careful of your jumps across the electrical water. You cannot go right across, of course. Go west if you want to collect some stuff, but I don't recommend opening the far west door due to the overwhelming amount of powerful enemies in a small space. The north door has a puzzle inside that can be solved with a little patience. Activate the consoles in the order on the door. The flickering is the most annoying part. The room has some research and a Remnant Data Core for that mission. Now go back to the lower area just before the jump blocks and trigger the console. Go all the way across and trigger the console on that side to open the door. You'll have to trigger it again on the way out. Inside the room trigger the consoles slowly, most of them summon Remnant. Activate the console for the purification and go back west to the shielded door you may have noticed for some items or just run out to the exit console.
It's good to gain the trust of the leaders here and do the other missions it takes to get an outpost going. If you are doing “The Firefighters” mission, don't scan anything if you want the happy ending. Just go into the back room and talk to the kid and help him.
“Cora Harper: At Duty's Edge” is her loyalty mission. If your Cora's level 6 abilities are where you want them, feel free to skip this one if you don't care if the captain of the Hyperion survives the end of the game. The hangar battle is not too bad, just keep sending your squad toward the same target and your VI will take care of enemies by itself. There are a few minor encounters as you explore on your way to the Fire Control area where there is another battle. The area with the mass effect device can be a little annoying. The two cables downstairs have destructible cover around them, so you may need to move around if your cover goes away. In the big battle, make your way to the east side. The Valiant will stay in one area of the west side. He does not summon reinforcements, so it's just a matter of wearing him down. Keep Sarissa's secret for maximum benefit later. You can now respec Cora if you need to get her level 6 powers where you want them.
Hunting The Archon
There is no combat aboard the Salarian Ark. Once you get on board the Kett ship there are several battles. The battle in the gun room is more intense, but it is more long-drawn-out than hard. Just be sure to take out the rest before you worry about the Ascendant. Switch to your shotgun for him, it takes him down a lot faster. After the lab, you have an involuntary stop on the way to your goal. After a few conversation options, go into the room past the windows to find the console to open the next door.
In the Archon's chamber, scan everything for a lot of Remnant points (more if you got the AVP perk for extra points) and then prepare for a battle once you interact with the artifact you came for. You have a choice afterward. Would you rather fight a lot more of those Behemoths or have a lot of Krogan helping you at the end of the game?
Save the Krogans, you get Salarian aid either way. The Kett will keep coming, so you have to advance as you battle. As soon as the next door opens, head in there. Sometimes the door doesn't close behind you and sometimes you can evade through it with the Explorer profile. Take out another Ascendant and you are on your way out soon after.
You should now be able to unlock the AVP Perk “Fusion Support” that makes it less costly to mod your armor. Even with this perk, I find that the only one that is decreased enough to be useful is “Fusion Mod of Resistance” that gives you a +20 Damage Resistance bonus at a cost of 5% damage done by you.
There are a lot of missions that have opened up at this point. Feel free to run around the galaxy a bit and work on them. Some of them lead toward loyalty missions and some just get you more AVP points (but you can always use those) for perks. I'll note the important ones for you.
“Peebee: Remnant Scanner” is pretty straightforward. You can avoid the battle with the outlaws on Eos if you leave the area as soon as you get the piece of technology. The Havarl one is inside the building you went into for the monolith missions, so you can get in there without fighting most of the numerous Remnant in the area. The tech is guarded on the inside by Remnant, of course. Don't miss the stuff in the room with the woman. When you get back up, you can fast travel from there. The one on Kadara is at one of the monolith sites, at least it's supposed to be. Fight the outlaws and head back to the port to get this resolved.
“Peebee: Reclaiming Poc” takes you to a remote building with one non-aggressive Scavenger and Poc.
“Truth and Trespass”: You'll get this in an email soon after starting “The Journey to Meridian.” The FS above the chasm makes a good vantage point for the first fight and there are a few smaller ones on the way to your goal. After a small Kett battle, you're sent to Voeld. There are two Kett battles on the way to the Kett goal. You can just drive by one of them. At the second one, rush into the building to keep warm when you need to. On Elaaden take care of the enemies and talk to the Salarian. Head back to Kadara to the next goal. Arrest Dr. Aden at the end.
Elaaden
“Turian Ark: Lost But Not Forgotten” points you here. It's a good idea to get the heat under control before you run around fighting and scanning things. There is not any combat in this mission once you leave the planet. Convince Avitus to be the Pathfinder for the best result later.
“Dissension In The Ranks” leads you to a pretty easy battle, since they are fighting each other as much as they are fighting you. You'll need to go back to the Tempest to advance the mission. You need to complete it after you finish “The Journey To Meridian” for maximum benefit.
The most annoying part on this planet is that not every shadow gives you safety from the sun. The sinkholes are even hotter than the other parts of the planet. Thankfully, fixing the planet here eliminates the heat danger. The monoliths for “Taming A Desert” are marked on your map from the beginning. The one directly west of your starting location has the console (and related glyphs) in an area on the south side of the monolith. You first need to activate the consoles that control the jump pillars. It's easiest to only worry about getting the right side pillars all up at once. The left console controls the back, the middle controls the front and the right controls the middle. You can scan two of the three glyphs without jumping to the pillar it is on. Go to the northwest to the next closes one, but be careful of the Flophouse nearby (for now, you'll probably come back later.) The area with the console is near the monolith. The second console brings up some jump pillars. The last one is to the far northeast. Use the rocks to get up to find the glyphs and then solve the puzzle.
The vault is near the big ship, you may have seen it on the way to the third monolith. Inside the vault, there are a few things you need to know. The five console puzzle is solved easily by activating the far right one and then the one just to the left of it. As you enter the huge room, look to the right where there are two consoles. Trigger both and then go to the two you can now reach and trigger them. Go back to the first two and trigger them again to gain access to a fifth console that will open a nearby door. The most powerful enemy in there is a turret that you can take control of with a console. The console at the end opens the door and a path back to the middle. Go to the left side and don't mess with the first console you find. Take out the two Nullifiers across the way and then jump over there and activate the console that will turn on the bridge. Now you can go back to the middle and turn the vault on after another Nullifier battle.
Now you can go back to the Flophouse if you want, it is needed to put an outpost on this planet. You'll end up there later, but if you clear it now it makes it faster later.
“Investigate Remnant Derelict” leads to a battle with scavengers first, then you have to avoid a bunch of Remnant turrets by going to the left side of that path where there is more cover. You still have to fight some of them. Take down the Remnant at the end and find the glyph to activate the console using the hot and cold finder and by following the wires. It's just outside the room you are in. Follow the path to the final console that leads to the exit. Follow the lights, fighting a bit on the way out, to end this mission and lead into “Search For The Stolen Remnant Drive Core.”
At the goal, you will want to get out your shotgun for a fast-paced close-up battle. Head to the middle of the nearby boxes and scan the central one for an update. Head to the next point and scan the bodies and things by the crashed shuttle. Read the datapad for the password. Now it's back to the Flophouse. If you cleared it before, you may have noticed a door that could not be opened. It opens now and leads you into the Flophouse area. On the far side of the area is a cave with a green lit door. Fight the enemies and then head down into the center and get the drive core. Head back to the Krogans and end this by giving Morda the drive core. If you have 100% on the other four planets, this will be #5 once you make an outpost here.
“Nakmor Drack: A Future For Our People” takes off directly from New Tuchanka as soon as you talk to Hark. The main threat is the Sharpshooters for most of the mission. There are two Hydra robots at the end. Don't drop the guy at the end of this part and then head back to the Nexus to complete the mission.
“Water Supply” gets you a bit more help at the end of the game if you keep the secret. You also get bribes, which is nice.
I didn't do Vetra's loyalty mission (Means and Ends) this playthrough because it adds no resources, or changes anything significant, at the end of the game. Liam's mission (All In) doesn't add anything either.
Doing “Jaal Ama Darav: Flesh And Blood” is the only way to make sure that Jaal's family will be there to help you at the end. Bring Cora for maximum shields and stuff. Her Cryo Ammo shotgun helps a lot too. The battles to the end are not that tough. Use your Tactical Cloak as much as you can to get the four bombs and then worry about the Roekaar. The outcome of the mission does not influence whether they help or not, but it does add more Roekaar to several battles if you kill Aksuul. You may as well check your email so you can land back on Havarl again and do the follow-up quest while you are here.
“Peebee: A Mysterious Remnant Signal” is her loyalty mission. Once again, Cora is a good idea. You don't need to scan the rocks covering the console, just bash it and activate it. When you get to the next one, Peebee suggests you leave the bots alone. A solid strategy, except that opening the next gate makes them attack you anyway (Sam warns you of this if you go to open the gate first). It's up to you how you begin the fight, but you need to get through this area somehow. This is a mid to short range fight, so your shotgun is a better idea than your sniper rifle. The next one is a bit easier. I have yet to see Kalinda's men in sniper range. In the next area, look for a console under a rock and then go to the crack in the wall to get the goal to use the console. You definitely want to activate the turret to your left to help with the fight. Depending on your aim, it may take two Cobra RPGs to take down that Destroyer in this battle. In the battle with Krannit, I've noticed that sometimes he does not move much and makes a great target. In the next battle, there are two Observer spawn points you can use. You can hit the one on the left as the battle is beginning and the other one while you are fleeing giant robots near the end of the battle. Don't shoot Kalinda, you get better benefits if you let her live. Just run!
“Ryder Family Secrets” should be complete (or close to it) at this point. Go ahead and get that wrapped up if you need to.
“From The Dust” starts when you read a datapad in the dome near where you land on H-047C. This will mark the rest of them. The first three domes have all sorts of enemies, big and small, as well as quite a bit to mine in each one. The last one is actually two domes.
“The Remnant Tiller” begins when you finish the previous quest, but you may accidentally run across the Tiller's bubble while you are exploring. Once inside, fight off a couple Observers and activate the console on the left so that you can get a friendly Observer to fix the console that opens the door. There is no bridge directly across, so you need to go around to the right. Unless you are treasure hunting, ignore the consoles that have blue beams leading to the walls. These require an Observer to fix them and will lead you to items eventually. There are several groups of Remnant in here, the final group including a Destroyer. It's nothing a strategically placed Cobra RPG can't handle. Turning on the tiller makes a direct path out open up.
The Journey to Meridian
The first bit is easy enough. Once you get down the gravity well, there is a Kett battle. You need to remember that most of the cover in here is destructible. In the second wave of Kett, the Remnant come to see what the fuss is all about. They will help you with the Kett as long as there are still Kett. Watch your step as you go, there are a lot of puddles of black liquid that will kill you as fast as you can notice that you stepped in one. The Scourge also makes spots that look like ash, these are bad for you too. The fact that it is raining (and not putting out the little fires on the ground) makes it a little hard to tell good water from bad, but the reflections usually differ. First head left into the Exploration Systems area. When you get to a place where there is a nonfunctional console, look on the ground below for something resembling a shuttle roof. Jump toward that to avoid the Scourge but don't land in the black puddle right next to it. There are also a lot of Scourge areas nearby to avoid, jump up to the right. The ramp down leads to another battle, but you can turn the turret to your side if you can get over there. The glyphs near the end console seem to mean nothing as far as the order to activate the four consoles in. Facing south, you need to activate them near right, near left, far right, then far left. The other console, the one that faces the aircraft, is now active. Remnant also become active, including a Destroyer that will come up the ramps toward you. The turret just outside of the exit will fight for you against the Remnant out there that appear. The console makes a bridge that goes under the path you need (to a container that is very hard to reach), but you can easily jump up.
A turret in this area is also on your side, if you interfaced with the other one. You can sit by and watch the Kett and Remnant fight for a bit and then go after the survivors. A console on the left makes a bridge to the middle and then to the Research side of the area. A console on the upper level turns on a turret to help against the Kett. In the big room, a console on the left side turns on a turret. In the next room, activating the console advances the story. Some Observers show up, but if you don't get scanned they won't attack you. Back in the main room, a few Kett are joined by an Ascended. Your turret is still there if it survived before, and the Ascended will attack it more often than he attacks you. Take the lower path until you can jump up to the upper one. Follow the goal point to a bridge with a fiend on the other side. The Kett over there will ignore you for the moment, so shoot at them to weaken them a bit as they pass by. Once you reach that bridge, you might let the Destroyer help you with the Kett for a bit as you whittle them down. There are a lot more Remnant on your way to the goal.
A scene that reminds me of Star Wars and another battle, this time with a glorified Destined who will summon friends (including a Fiend) at HP increments. It looks like you need to go find what you thought you were here to find. Wrap up any of the loose ends you wish before you get to far into that, however.
For “Dissension in the Ranks” the first waypoint on Eos is a bit misleading. It's inside the cave close to Site 1 that you may have been through before while exploring. The one that prompts comments about them having Initiative supplies. The conversation inside the building at the fourth waypoint leads to a choice that affects “Meridian: The Way Home” and will make things a bit easier. You only get the code if you wait on this mission until this point in the game.
I was only able to craft my Heleus Icon Armor (Chest/Legs/Arms) at level VIII due to lack of Heleus points. I crafted the helmet at level X because I had the research already. I gave the set some bonus power damage to armor and shields, added damage resistance at low health, extra combo damage and shield /health regeneration delay reduction. In comparison to the Kett Unity X, it is a bit more well-rounded. It increases bonuses from all powers, not just combat powers.
Meridian: The Way Home
Some data collection points may be bugged, so if you cannot collect from one then just pick another. There are more than three in the galaxy. Be sure you did everything you want to, especially anything involving the Hyperion, before you commit to the last mission. You can still do a lot afterwards, but not everything.
The goal is past a small encounter with Remnant. You are supposed to collapse, after you trigger the console, so don't sweat it. Time to play as your twin. Short and sweet. You get a level 1 pistol and now have to fight to the goal. There are two short battles with two Kett each, just take cover a lot for the first one and the other one is just shooting at enemies who are not even shooting at you. When the soldiers tell you to run, do it.
Back in the Remnant city, it's time to continue what you started. Wow, that thing is huge. Even though you go back to the Tempest, it is still technically part of this mission and you have to rely on auto-saves.
Once you get to the planet, everything you worked for falls into place. The Nomad rush reminded me of the final Mako rush in the first Mass Effect, without the time limit. You'll have to get out shortly before the goal marker.
You'll have to fight your way forward. Your allies will come help you soon enough and the kill code, if you chose to get it earlier, can be used afterward. The bridge battle is pretty straightforward, they don't really come up to you and the ramp to your right is the only connection between the two areas. Throw or a high weapons force rating makes it fun against unshielded enemies. After a few more rooms, you have another battle with a mini-boss in a bubble and his friends. Keep pressing on, the Krogan helping makes it go a little faster. You'll face another boss in a bubble before too much longer.
Eventually, you will end up in a big room with a lot of Remnant and an Architect in the middle. Do your best to avoid the Architect's attacks (attacking it back is useless since you cannot kill it), but don't get killed by the other Remnant while you are doing that. If you move too fast, you have to wait on the story. You need to kill Remnant steadily as you go. You only need to defend the first two consoles (and one bridge in between), the third one is turned on when you get there, so Tactical Cloak yourself across and push the button. Thankfully, you get auto-saves frequently as you do this part.
Your well named achievement pops as soon as you get to the credits. I ended at level 118.
Game Over, Man!
 O Corpo
TrueAchievements
TrueAchievements
I did not notice this but found it is important. During your 5 gold extractions, I was in the extraction zone, and went down (dying). I was not revived while in the extraction zone and it DID NOT count. So, I do recommend that you carry the two revives and save them for the extraction round. If you die during the first 6 levels, and your team passes you get revived. So, save those 2 revives for the extraction round. As far as I know, you can only carry 2? (I may be wrong on that , but I would have bet money that I had way more than 2 and was able to use only 2). Best of luck!
 confusedgeek
TrueAchievements
TrueAchievements
 rmchiva925
You can either do this in single player or multiplayer.
In Single Player:
You have to complete all of the Main Priority Ops missions on Insanity mode (hardest difficulty). Enemies can kill you really quickly, have increased health, shields, armor and are more aggressive. Insanity is available from the start, but it's advisable to beat the game on a lower difficulty and run through Insanity mode on NG+ with all your unlocked upgrades, guns and gear.
A really good build is to use the Engineer profile as it has a drone that follows the main character. When enemies get close, the drone unleashes an EMP that stuns enemies. You can then combo this with the skill Overload. Enemies can be chain stunned by using this combo effectively. Other useful skill for the Engineer Profile are the Assault Turret, Remnant VI drone, and the Tactical Cloak. Drack and Cora/Peebee are recommended as Teammates for this build. Let your teammates and the turret/drone fight the enemies and you can kill enemies from a safe distance. If teammates go down, use the Tactical cloak to revive them safely.
If you are planning to do Insanity on you first run, and are stuck, refer to rubhen925's Insanity mode Walkthrough hosted by Fextralife (by collaboration) on YouTube. This walkthrough only focuses on all the combat encounters in the Main Priority Op missions, and loyalty missions for all 6 squad teammates. All cutscenes, story, dialogue, and extra stuff has been cut out to not ruin the game/story for the general audience.
NovaDragon on reddit has posted a really powerful build for Insanity, and should help you through the mode if you are struggling. Consider taking a look at it here - https://www.reddit.com/r/masseffect/...inite_ammo_no/
Thanks to Aramintai for posting about this find!
In Multiplayer:
If you choose to do this in multiplayer, you will need to assemble a team of 4 players that are level 15 and above to make things easier. You have to complete 5 APEX Gold extractions, and these are really difficult. You and your teammates need to have a sound strategy and have a lot of high level skills, weapons, and items to be successful with this.
Aeirou has suggested using this setup and given tips for making the gold extractions easier:
Set the game in this format:
Map - Firebase Zero
Difficulty - Gold
Enemy Type - Outlaws
It is recommended to use the Infiltrator character, because it allows the use of Tactical cloaking for safe revives and disabling devices with ease. But in reality any class is viable, as long as you are at a decent level with good character upgrades and weapons.
The recommended level should be 15 with your preferred class. Use your multiplayer currency to buy the basic chests to begin with, so you can eliminate as many uncommon items as possible options in the future. Then you can focus on buying Advanced Chests when you are playing on gold maps. The goal is to get the Vanquisher Sniper Rifle, which is extremely useful for gold extractions.
You can also get "carried" easily through gold extractions as well. It takes about an hour and 15 to 20 minutes to complete even with random players. There's a good chance you can get to about level 10 and then try to match up with a decent group to carry you through it.
Use the Co-op Partners Thread to find other players to attempt this trophy with.
The, Pants, Party
As you can see from the description, you can earn this achievement in either SP or MP. If you do not wish to play the MP at all, you will need to ensure you begin your game on Insanity difficulty and play through to the end without changing the setting. If you would prefer an easier time in the campaign, you will need to dedicate some time to the MP portion so that you can level up a character, learn the maps, and find a decent team (or get lucky with matchmaking) to successfully complete five Gold difficulty co-op missions.
I think time-wise it would be beneficial to go the SP route, since you need to play through the entire game anyway. You may spend some extra time in combat and possibly more time if you die and need to replay certain sections, but the MP in this game is much harder than ME3, so you'll definitely need to spend a good amount of time there to succeed with five Gold missions. Your choice though!
NOTE: You can do this in New Game Plus if you wish as well. This will allow you to bring a high-level character through the story and only focus on Priority missions, which will help alleviate some of the difficulty.
spider23rus
 stratege.ru
stratege.ru
As you can see from the description, you have 2 ways to get the trophy: go on “madness” or complete 5 evacuations on “gold”. Let's look at both options:
Option 1 (quick): it will take you about 6 hours - complete the game on “madness” in the “New Game +” mode with a pumped-up character; changing gender will not affect skills. There is nothing complicated about it, we just follow the storyline without being distracted by side effects. It is enough to take a shotgun with a drum ("Piranha", if memory serves), install homing plasma cartridges on it and pump it up for damage. At the same time, on the second playthrough you can get trophies that you might have missed (as in the case with me, a trophy for relationships). In addition, this option is ideal for those who are absolutely not interested in multiplayer.
Option 2 (long): will take 20 hours - complete 5 evacuations on gold. Everything is simple here: before you can complete tasks for “gold”, you will have to spend time in multiplayer to level up your character to at least lvl 18, plus rack your brains with sets.
 ), accordingly, when you decide what to upgrade or what arsenal to take, it is always better to focus on survival, regeneration and restoration of skills and from skills.
Next, I highlighted what I downloaded and what I used (I went straight to madness, there were difficulties only at the beginning - “not leveled up” )
Skills:
I would highlight the most useful: Onslaught, throw, blast wave, reflection, energy absorption, tactical camouflage and invasion (personally my opinion)
1) ONSTANCE - the most useful skill that restores your shield (in my case - completely) and teleports to enemies. Combines with melee attacks. The point is to pump it to the max and when pumping choose options!!! quick recovery!!! abilities. Result: This skill can be used every 4 seconds. Accordingly, theoretically, if you haven’t been killed in 4 seconds, you won’t be killed.
P.S. Although it is written that it restores 50% of shields, but with the correct leveling of “passive skills” and the corresponding “profile”, it will not be 50%, but 100% (i.e. 100% shield, every 4 sec). I also want to pay attention to the fact that this is a “detonation”; therefore, it is better to take into your kit some kind of partner or skill for the “possibility of detonation”, for example: “energy absorption”, “push”, “explosive wave” (with a certain leveling up)
2) THROW - you can throw enemies without armor and shields, the function is “explosion” and “explosion capabilities” (with a certain leveling), the skill is also restored very quickly (again with a certain leveling). Distance - large, otherwise useless

3) EXPLOSIVE WAVE - causes damage, “detonation” and “detonation capabilities” (with a certain leveling). The advantage of this skill is that it causes the “possibility of blowing up” any enemies, whether with shields or armor. (I would call it an “improved throw”, but the distance is small
 )
)4) REFLECTION - gives time to recover for other skills, holding back the damage and reflects part of it into the enemy (for other uses it is extremely doubtful). With a certain leveling up, it restores your “Shield”, which is also useful.
5) ABSORPTION OF ENERGY - a useful skill, restores shields, heals the team (with a certain leveling), “possibility of detonation” (with a certain leveling). Pairs well with Onslaught
6) TACTICAL CAMOURING - helps to avoid damage, death, will restore your strength, skills and shields (with a certain leveling). It is best used to change position when “pressed” and when lifting allies.
7) INVASION - useful to speed up the “killing” process. It is better to use against "fat" bosses and enemies.
PASSIVE SKILLS: It’s better to level up on regeneration, recovery skills, extra. shields, strengthening and restoring the skills of you and your team, reducing the weight of weapons (to reduce the penalty for restoring skills).... in short, everything that helps you survive.
Armor, profile and armor module:
Here I gave preference to “relic armor” because of the bonus to damage resistance and various regenerations.
Fast recovery and protection - what more do you need?

Profile - "Guardian" - more protection, more shield restoration, well, uh.... and other goodies.
I personally took the armor module for accelerated skill recovery (at the expense of damage) or max shields (at the expense of health).
Who needs health that only recovers to half if there are shields? Or who needs to sit behind a barricade shooting at enemies, if you can “fly” around the map, creating various things out of thin air?))) (also with a certain leveling)

Partners:
1) Cora - for me, the most tenacious character, even more tenacious than Krogan
 . Worth taking, anyone in doubt , since she restores shields with an onslaught and is the most effective character who can heal shields both for herself and !!!YOU!!! Moreover, it’s even very good (again, with a certain pumping). But that’s not all, she can also heal lives!!! (with a certain leveling), which is also very useful.
2) I would take Drac or Vetra. Purely for the fact that they die less often and help quite well, and their skills are not complete... well, you get the idea. I won’t go into details about pumping them up; it depends on your play style and desire to cooperate with them.
The rest is up to your taste and color... and orientation
Weapon:
Well, considering that I mainly use my skills and teleport around the map, I’m like a character from an anime
(my choice is onslaught, energy absorption, blast wave) - the choice is not particularly important.1) For melee weapons, I would take the asari sword (a lot of damage + “some” teleportation). It's hard to get used to at first, but then it's normal. You can sometimes teleport through walls, or make the game freeze, well, let's not talk about that
. Weaker weapons, it seems to me, are not particularly effective.2) Shooting weapons - here the choice is yours. But I’ll tell you one trick about relic weapons. "Relic weapons" are weapons with overheating, but with endless ammo. Hmm... Something's wrong here. Surely there can be some kind of clever ass here...
Enhancement "Bioconvector" (which can be learned when creating items for 50 scientific data) - removes 5% of health when the clip is empty and replenishes it.
Considering that I don’t rely on lives in this game (for me this is already an indicator that I’m already dying), and after some time the lives themselves are restored to 50%, and with my partner “Bark” (again, with a certain leveling ) can be restored up to 100%, then 10-20 clips glued together with alien tape is a good bonus.
PS I ran the entire game with the “Shadow” lvl 3 (this module was the only one I had) and I used this sniper as a laser machine gun, a sniper, a decorative item of an alien civilization that I hold in my hands, a scratcher for the kett, etc. and never complained.
XmanIRUSI
stratege.ru
stratege.ru
ps don’t waste credits on everything, but save up for premium sets
First of all, it is EXTREMELY advisable to open and upgrade all bronze cards.
Character cards can now give you an additional +25 skill points. Weapon modules are also very useful. It is also important to accumulate consumables, amplifiers and an increase in consumable stocks, and all this can be obtained faster in sets for 5K.
Personal tips for passing.
Create a custom match
- TASK: OWN
- MAP: BASE ZERO
- DIFFICULTY: GOLD
- ENEMY TYPE: BIGANTS
- ACCESS TO THE MATCH: OPEN
On the 7th wave, dismantle the hydras and berserkers from the same point for up to 40 seconds. then run to the evacuation point on the right or through the rooms on the left.
Passed as a solarian architect lvl 20, VI pumped to max + max passives + combat improvement. 90% used "SCORPIO" with the barrel and magazine mods.
Passed without draining 5 times in a row.
 oh yes - if you choose between madness and the network, choose the network - your nerves will be healthier)))
 PSNProfiles
PSNProfiles