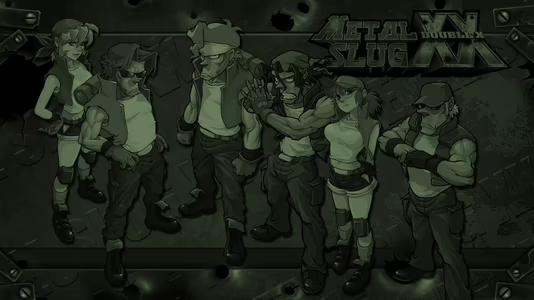

Metal Slug XX
12 Achievements
200
Xbox 360
Xbox One
Xbox Series

Metal Slug XX Master
Clear all the missions without continue.
50
How to unlock the Metal Slug XX Master achievement in Metal Slug XX - Definitive Guide
 Black Mesa
 TrueAchievements
TrueAchievements
Alright, this may seem like a tough task, but this title is not as hard to complete as its predecessor here on XBLA, with enough practice you'll clear most of the levels with relative ease.
Disclaimer:
* You can not get this achievement in co-op, it has to be done in singleplayer.
* You also can not simply load up the Final Mission, play through it without dying, and hope to get the achievement. You'll have to start from Mission 1.
* The difficulty won’t affect the achievement, so feel free to set it to Beginner (I actually encourage it).
Preparation:
Now then, I highly recommend playing as Fio. Her weapons are much more powerful than any of the other characters (With the exception of the Heavy Machine gun, that one belongs to Marcus. Thanks https://www.trueachievements.com/Kenneth1250.htm), making most of the boss battles a breeze. She also has a TON of ammo for her weapons, which is a massive help in this game.
The other popular choice is Ralf, being because he has the benefit of being able to take two hits before dying. Now he may seem like a tempting choice because of it, but do keep in mind that since his weapons are weaker, you’ll have to dodge more, and you’ll more likely end up facing more than one phase of a boss, which only makes it harder than it has to be.
With the above being said, there is also a DLC character availabe for purchase (80 MSP). https://www.trueachievements.com/RazorPriest.htm has some great information on Leona, so should Fio, Ralf or any of the default characters not suit your needs, keep reading:
‘’Leona has almost as much ammo as Fio, does huge amounts of damage with the HMG (I'd say as much as Marco at the very least), and has a special skill (press when standing up, doesn't work when crouching/jumping) that destroys all bullets in a circle around her. It can be used indefinitely and even destroys things like the blue energy balls the 5th boss likes to use, or rockets or pretty much anything you can think of. Even tanks can only take one or two hits from it, and since its animation is not even half a second long, it can get you out of situations where you'd otherwise be completely screwed. Oh, and did I mention she gets to keep her weapons when she dies?’’
Below is a run through the game without dying, or 'No Miss' if you will. Do note however, that it's being played on Hard, so you won't have nearly as tough a time while playing on Beginner.
There is also a few things the player in the video does, which has an easier way to it:
MISSION 1!:
Don't choose the path below. It's much harder than simply following the level straight ahead, which also gives you a tank for the boss.
MISSION 2!:
You may notice that in the beginning, the player is swarmed by soldiers. This is a trick used by most who goes for a good score, so unless you purpousely trigger this, you'll have a MUCH easier time here.
MISSION 3!:
This boss can actually be done in less than a minute on Beginner. As the fight starts, equip your Flame Shot, and shoot 4 times on its lower body to the left, followed by lobbing 4 grenades on it to blow it up. Now fire 3 shots on the upper body, followed by detroying the crate to your right to reveal a vehicle that you now jump in to. Keep firing at the boss and it will die within 10 seconds.
MISSION 4!:
This boss is an absolute joke on Beginner. Once you enter its ''Lair'', you'll notice there's two POW's on each side of the screen, free the one on the right as soon as possible, and pick up the Thunder Shot he drops. Now position yourself on top of the boss, and keep pressing until it dies. You literally don't even need to move at this point.
MISSION 6!:
The only thing I should mention here, is that to perform what looks like an Uppercut Punch while you're in the huge mech, you hold then press
  . Using this technique as the Mech boss does his 'Rush' move, you'll have a chance to block it completely. It can prove difficult to time it, as the boss has a tendency to break through it, but the more you do it, the better you'll be at predicting his movements. This attack also deals great damage to the boss.
FINAL MISSION!:
This may sound crazy, but stay AWAY from the tank in the beginning. It will make things much harder than it has to be. Choosing the tank, the game will pit you up against much tougher enemies than it otherwise would if you chose to go on foot, in which case all you'll face while going down the walkway is 1 plane, the rest being foot soldiers.
The said plane won't even be able to hit you with its missile unless you jump into it, as it will simply fly past you from above.
And that's it, if there's anything you feel like I've failed to meniton, feel free to ask, and I'll gladly add it in. Here's the videos, good luck! (Credit for the videos goes to YouTube user GreedMetal)
Mission 1-2: (Mission 2 at 4:12)
Mission 3-4: (Mission 4 at 5:02)
Mission 5-6: (Mission 6 at 4:56)
Final Mission (Part 1):
Final Mission (Part 2):
Disclaimer:
* You can not get this achievement in co-op, it has to be done in singleplayer.
* You also can not simply load up the Final Mission, play through it without dying, and hope to get the achievement. You'll have to start from Mission 1.
* The difficulty won’t affect the achievement, so feel free to set it to Beginner (I actually encourage it).
Preparation:
Now then, I highly recommend playing as Fio. Her weapons are much more powerful than any of the other characters (With the exception of the Heavy Machine gun, that one belongs to Marcus. Thanks https://www.trueachievements.com/Kenneth1250.htm), making most of the boss battles a breeze. She also has a TON of ammo for her weapons, which is a massive help in this game.
The other popular choice is Ralf, being because he has the benefit of being able to take two hits before dying. Now he may seem like a tempting choice because of it, but do keep in mind that since his weapons are weaker, you’ll have to dodge more, and you’ll more likely end up facing more than one phase of a boss, which only makes it harder than it has to be.
With the above being said, there is also a DLC character availabe for purchase (80 MSP). https://www.trueachievements.com/RazorPriest.htm has some great information on Leona, so should Fio, Ralf or any of the default characters not suit your needs, keep reading:
‘’Leona has almost as much ammo as Fio, does huge amounts of damage with the HMG (I'd say as much as Marco at the very least), and has a special skill (press
Below is a run through the game without dying, or 'No Miss' if you will. Do note however, that it's being played on Hard, so you won't have nearly as tough a time while playing on Beginner.
There is also a few things the player in the video does, which has an easier way to it:
MISSION 1!:
Don't choose the path below. It's much harder than simply following the level straight ahead, which also gives you a tank for the boss.
MISSION 2!:
You may notice that in the beginning, the player is swarmed by soldiers. This is a trick used by most who goes for a good score, so unless you purpousely trigger this, you'll have a MUCH easier time here.
MISSION 3!:
This boss can actually be done in less than a minute on Beginner. As the fight starts, equip your Flame Shot, and shoot 4 times on its lower body to the left, followed by lobbing 4 grenades on it to blow it up. Now fire 3 shots on the upper body, followed by detroying the crate to your right to reveal a vehicle that you now jump in to. Keep firing at the boss and it will die within 10 seconds.
MISSION 4!:
This boss is an absolute joke on Beginner. Once you enter its ''Lair'', you'll notice there's two POW's on each side of the screen, free the one on the right as soon as possible, and pick up the Thunder Shot he drops. Now position yourself on top of the boss, and keep pressing
MISSION 6!:
The only thing I should mention here, is that to perform what looks like an Uppercut Punch while you're in the huge mech, you hold
FINAL MISSION!:
This may sound crazy, but stay AWAY from the tank in the beginning. It will make things much harder than it has to be. Choosing the tank, the game will pit you up against much tougher enemies than it otherwise would if you chose to go on foot, in which case all you'll face while going down the walkway is 1 plane, the rest being foot soldiers.
The said plane won't even be able to hit you with its missile unless you jump into it, as it will simply fly past you from above.
And that's it, if there's anything you feel like I've failed to meniton, feel free to ask, and I'll gladly add it in. Here's the videos, good luck! (Credit for the videos goes to YouTube user GreedMetal)
Mission 1-2: (Mission 2 at 4:12)
Mission 3-4: (Mission 4 at 5:02)
Mission 5-6: (Mission 6 at 4:56)
Final Mission (Part 1):
Final Mission (Part 2):
27 Comments
I know this game is kinda old but I also want to add this information.With Leona u can take one extra hit while u r in the MECH , tanks , or Slugs or how ever u call them, which is extremely helpful for the last mission !
By Jamal2807 on 11 Jul 2017 12:50
I just unlocked ths today (offline) and I have something you might want to add to the guide. Namely, the DLC character. Leona is by FAR the best character in the game. She has almost as much ammo as Fio, does huge amounts of damage with the HMG (I'd say as much as Marco at the very least), and has a special skill (press Y when standing up, doesn't work when crouching/jumping) that destroys all bullets in a circle around her. It can be used indefinitely and even destroys things like the blue energy balls the 5th boss likes to use, or rockets or pretty much anything you can think of. Even tanks can only take one or two hits from it, and since its animation is not even half a second long, it can get you out of situations where you'd otherwise be completely screwed. Oh, and did I mention she gets to keep her weapons when she dies? Yeah, and she's only 80MSP. Totally worth it :)
By Awoo on 16 Jun 2012 23:04
 Styles Plural
TrueAchievements
TrueAchievements
To unlock this achievement you must complete all seven Missions in a row without ever using a Continue. In other words, you'll need to perform a 1CC (One Coin Clear) playthrough of the entire game from start to finish. While the original solution provided above is plenty helpful in its own right, some information regarding the missions could be further expounded upon. Therefore, this solution intends to be a retooled "Beginner-friendly" guide toward the achievement. Other notes to Metal Slug XX Master include:
➀ This achievement can be earned on Beginner difficulty.
➁ You can get hit up to 2 times maximum and still unlock the achievement.
➂ This must be done starting from Mission 1 and playing continuously all the way through Mission 7.
➃ Unlike Metal Slug 3, this achievement cannot be earned in Co-op Mode.
Important Note: Before starting the game, be sure to Turn ON the Auto-Fire in the "Controls" settings by selecting Help & Options from the main menu. This makes it so you can endlessly fire your weapon by simply holding down the -button instead of having to continuously tap it.
Gameplay Tips & Hints:● Play on Beginner difficulty! Enemies and Bosses are the easiest to defeat in this mode and each character's default weapon will be the Heavy Machine Gun (Fio's default will be the Big Heavy Machine Gun).
● The Heavy Machine Gun should be your main weapon. With it, you can slowly inch forward and shoot in a 90° angle by holding
● Take your time and don't rush forward! This will spawn enemies more quickly and you'll be instantly overwhelmed. Instead, slowly inch forward while spamming your HMG to take out enemies as they spawn onto the screen.
● When surrounded by enemies on both sides, crouch and shoot while turning left and right! Your character turns left and right much faster when crouching than when standing. You'll take out enemies more quickly and it minimizes your hit-box making it easier to avoid soldiers trying to knife you.
● Practice! You'll need lots of time playing through each of the 7 missions repeatedly to learn enemy spawns and safe spots to avoid getting hit as often as possible.
● Find the best character to use that suits your personal preferences. See below for further details.
Recommended Character: Fio or Leona
Each Hero has their own unique skills and abilities. Based on the majority who've unlocked this achievement, it appears the most popular characters to use are Leona, Fio, and Ralf. When deciding who to use, the following should be considered: Leona has a bullet erasing special action as well as the ability to keep her weapon upon dying; however, Fio's Big Heavy Machine gun inflicts more damage than Leona's default weapon and Fio picks up 30% more ammo than Leona. Ralf's ability to take 2 hits before dying is promising until you realize that he only carries 50% ammo for special weapons.
Ultimately, I would suggest using Fio over Leona and Ralf. Fio's extra damage is useful for defeating bosses quickly and since the BHMG is her default weapon, being able to keep your weapons after dying might be more of a luxury than a necessity. With enough practice, being able to take extra hits and destroy projectiles will become pretty negligible. It might be best to use a character that encourages you to not get hit as opposed to excusing it. But this is the player's choice in the end. Test out each character and find which one works best for you!
For a full breakdown of each character and their abilities, see the overview below.
Character Overview:
Regardless of the character you decide to use, here are some relevant tips and strategies for each of the 7 Missions:
MISSION 1:
☞ This is an incredibly easy mission that should require little to no practice to complete without dying once.
☞ Run and gun until you get to the Scrap Tower. Spam grenades on it to take it out quickly. Once in the second section, pick up the Thunder Shot from the 2nd POW and spam it left and right while running forward. In the 3rd section hop into the Metal Slug tank to protect you from ever getting hit moving forward.
Worm-Mecha Boss
☞ Due to having the Metal Slug Tank, this Boss should be no problem at all. Wait for it to emerge from either side of the screen and simply shoot out each section of the worm to take it out quickly.
☞ After defeating the boss, the cutscene with General Morden can be skipped by pressing the
MISSION 2:
☞ While in the first elevator shaft section, after taking the 2nd lift down and going left, there is a POW hidden that will give you an Enemy Chaser. Shoot the invisible surface above the 3rd lift to make him fall down. The Chaser he gives you will make the upcoming Cave section easier.
☞ For the Metal Moles that fly upwards from the mud, use the Enemy Chaser to take them out easily. Watch out for their sink holes by jumping about while shooting the Chaser. The bullets should home right into them.
☞ For the Slug Trolley cart section, take it VERY slowly and avoid the cannons at all costs. They decimate your health. Slowly advance forward by tapping toward (to the right) and methodically killing enemies (spray your shot in all directions) from afar once they partially appear onscreen. If you're slow and deliberate, this section will be very easy to no miss.
Crablops Boss
☞ If you kept your Slug Trolley intact, then this Boss should be very easy. In the Trolley, you'll be able to take multiple hits without having to worry about losing any lives. Simply keep shooting at the Crablops' claws while taking out any missiles it shoots from above. You also have the option of bombing (
MISSION 3:
☞ For the first section, the Slug Armor you jump into should be able to endure both the first and second sections of the mission easily. Shoot everything in sight and use your cannon to take out the tank at the end.
☞ In the Lift section of the Mission, to keep yourself safe from most projectiles, move the Slug Armor to the upper right part of the lift incline while spraying your shot in a 90° angle. You can actually continuously back-step on the hill incline without even having to stand on the lift!
☞ While back-stepping on the incline to the right, jump up and spray Vulcan shots downward to take out the droids attaching to the bottom of the lift (their lasers can never hit you from the incline).
☞ The Downward Tunnel section can be tricky if you're not proactive. First, use the crank box to receive a Flamethrower. Take out the bats using your HMG then run down the chasm while shooting your flame and avoiding the hot iron ball.
☞ Don't get too close to the Maggot Hives. Kill them from afar with 3 grenades each before moving forward to the next crank box.
☞ To pull the crank boxes quickly, simply hold down the
☞ Don't forget to pick up the Thunder Shot and Bombs from the POWs while running away from the iron ball. You can use them for the Boss fight.
Destroyed Crablops Boss
If you picked up the Thunder Shot from the POW while running away from the iron ball, then this will be a very simple boss to beat. However, mind it's projectiles, maggots, and rock pillars! Occasionally Metal Moles will also spawn. As the fight starts, face to the left and shoot while also quickly tossing your grenades into the lower body part of the boss. Then begin moving right while continuing to spam your Thunder Shot until it explodes. For the top half of the boss, you have the safer option of opening the crate to the right and getting into the Slugnoid as soon as it appears. Being in the Slugnoid, will allow you to take some hits without losing a life but your Thunder Shot can also kill it in no time if you're willing to dodge more bullets. If you get hit while in the Slugnoid and need to evacuate, be sure to get directly below the boss and use a frontal attack (
MISSION 4:
☞ The majority of this mission can safely be cleared by slowly inching forward and spamming your Heavy Machine Gun in a 90° angle. Just be wary of motorbikes, helicopters, and paratroopers.
☞ Some have suggested to avoid using the Ostrich Metal Slug but I disagree. It's easier to jump over the Huge Ivy seed bombs with it. Also you can kill the Huge Ivy faster from afar by angling your gun just right and shooting it once it's exposed enough onscreen (after inching forward slowly). The Ostrich Slug also has more range with its Vulcan attack than you would with your HMG.
☞ For the Ostrich Slug section, take it slowly. Kill the Huge Ivy while jumping over seed bombs. Slowly inch forward, aim your gun upright just enough so that the Huge Ivy's center is exposed and shoot it until it's dead (while avoiding seed bombs). You can literally kill most threats offscreen if positioned properly.
Fall Mecha Boss
Easiest boss in the game. Once you enter the Boss area, quickly release the POW on the right side and pick up the Thunder Shot he gives you. Get on top of the Boss's head and spam your Thunder Shot with
MISSION 5:
☞ As the Mission starts, drop down from your parachute and simply walk forward while shooting to take out the enemies ahead (don't jump). There is an Enemy Chaser in the crate to the right below but beware of the snipers on the left!
☞ There is also a Thunder Shot that drops from a Melty Honey tank below you (left side) near the start of the mission. Use it to make the rest of the Initial Route easier when parachuting.
☞ For the section with the planes dropping missiles, you can avoid the first two by simply crouching and shooting. Walk just enough forward to spawn the planes, then immediately crouch and shoot. The missiles will either be destroyed or fly right over your head. Just be sure to jump over the missiles that come from behind you after!
☞ Be sure to preserve your grenades and special weapons for the Boss of this mission. Try to have 25 or more grenades saved up by the time you face off against the Boss.
The Union Boss
This can be a brutally hard boss if you don't know the Union's attack patterns. The Union is made up of three parts: The Head Tank (number 01), the V.T.O.L Gunship (number 02), and the Slave Tank (number 03).
The key to defeating this boss without dying is to kill each of the 3 red exposed cores quickly with lots of grenades and special weapon spam. You should stand on the head tank's (number 01) lower platform and crouch shoot (while also spamming grenades) at the slave tank (number 03) core to the left. Watch out for the slow red energy ball it shoots! It should be destroyed quickly.
Then quickly jump up, turn to the right, and begin shooting and spamming grenades at the head tank's (number 01) red core until it also is destroyed.
Finally the tricky part. Note the missiles that are probably being shot out from the head tank. Shoot these by standing on the head and spraying your HMG 90°. Get ready to dodge the Vulcan and plasma shots fired by the V.T.O.L gunship (number 02) from the left side and jump over them! Soon the parts of the boss will unite, and you'll be able to jump on top of the slave tank. Shoot above at the last core, then move to the VERY left of the slave tank to avoid being crushed. Wait for it to rise up again, shoot the incoming missiles fired by the head tank, then focus all your fire on the red core above you. You should be able to take it out by this point. I strongly suggest practicing the boss diligently before attempting this achievement. Preserving ammo from your Thunder Shot for this boss will make it much easier.
For more information on The Union Boss and all of it's attacks, please see the link below.
https://metalslug.fandom.com/wiki/The_Union
MISSION 6:
☞ This is the first stage to feature the Future Rebels. Luckily they are very easy to defeat and their Bazooka Solider projectiles travel very slowly allowing plenty reaction time.
☞ At the start of stage, be mindful of enemies coming from each side. Practice this first section religiously until you have it down. It's very easy to lose a life here with all the fanatics, helicopters, and paratroopers.
☞ The fourth section features descending metal sleds. Watch out for these and only touch the top of them! They can kill you if the edge touches you. Stay atop them while shooting enemies ahead.
☞ For the Slug Gigant section, it's important to know the controls for the mech. Pressing
☞ To defeat paratroopers more easily, jump toward them while firing your Vulcan shot upward. If timed properly, this will kill the paratroopers as they spawn onscreen. You'll need to memorize when they come on screen so that you can jump forward and shoot them dead before they ever have a chance to shoot at you. If any bullets do happen to come near your upper body, block them by moving your arms up to protect your face.
Rebel Gigant Boss
If you're privy to the controls of the Slug Gigant, he should not be too much of a threat. When the fight starts you should aim and shoot your Vulcan shots at him while simultaneously hitting your punch attack whenever bombs or missiles get near your mech. When he backs off to the right offscreen he will perform a rush attack on you. The moment he backs offscreen, immediately put your arms up (
MISSION 7 (FINAL MISSION):
☞ Despite what others say, I suggest you USE the Tank. If you practice enough, you'll be able to use the tank for the very tough second section, giving you those free extra hits you may desperately need.
☞ Ignoring the tank is another option. Yes, it makes the opening section easier, but it also means having to do the second section completely vulnerable so keep that in mind. At least the tanks gives you those few precious extra hits and in many ways increases your odds of survival.
☞ The Rebel Walkers (red robots) are very dangerous. They can deploy pods into the air which also shoot projectiles and must be destroyed. Be mindful of these enemies and take them out quickly!
☞ During the second section of the mission, giant rock rubbles will fall from above, memorize where they drop beforehand to avoid losing lives.
☞ Once you get to the Big Gate time portal mini-boss, simply aim upward and shoot it while moving left and right (to dodge the projectiles). It appears sometimes the projectiles are slow or fast but regardless you should never get hit.
☞ For the third section, you'll need to destroy a ceiling to move on. I suggest jumping up from the right side and immediately start spamming your HMG in a 90° angle to take out all the soldiers that spawn (this will also damage the ceiling) until the ceiling is destroyed and you can move on while jumping and frantically avoiding any projectiles that happen your way.
☞ In the fourth section of the mission leading up to the Final Boss, there is a secret MOBS (Mobile Satellite) weapon that you can pick up. It can be used to clear the section of enemies more easily and you can even take it with you to help you defeat the Final Boss! Just be sure to avoid picking up another weapon or else the MOBS will instantly break.
Kraken Boss
For the Final Boss of the game, you must practice it tirelessly. It has a variety of attacks and depending on RNG, you can easily be killed if you get an unfair combination of moves (especially during the second phase). The first phase where you must destroy all of it's tentacles is actually not too bad. The moves are fairly easy to choreograph, you can see them coming early just be careful to react accordingly and quickly! Once a tentacle emerges, go to town on it with grenades and shooting (while also minding the next attack to dodge). Exercise extreme caution when jumping from scrap platforms as they will move between each attack and entry of a new tentacle. As a plus, the boss might randomly drop weapon and ammo pickups each time a tentacle is destroyed.
Phase Two is much harder and cheaper due to the fact that there are attacks that, if you don't see them coming early, can be downright unavoidable at times. Try to avoid staying directly below the floating Kraken and stay on the move (while constantly shooting up at it) to avoid its various projectile types. When it dives into the lava, don't forget to jump over the lava wave. Shoot at it relentlessly and anticipate any projectiles that might come your way. With enough practice you'll learn the safest spots to shoot at it from as well as how to anticipate each projectile attack pattern.
For more information on the Kraken Boss and it's attacks, please see the link below.
https://metalslug.fandom.com/wiki/Kraken
 PineappleJoe
Good luck with this, I suggest playing on beginner and choosing Ralph as he seems to get a free life every so often. He can be knocked down and not die, unlike the other characters. Learn the levels, boss patterns and progress at your own speed. Don't rush off into a level and pay attention to where all your enemies are.