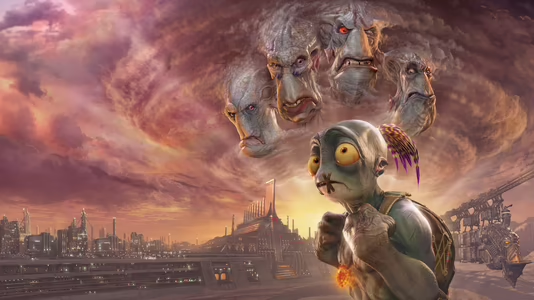
Oddworld: Soulstorm
33 Achievements
32-39h
PS5

Gameplay master, platinum
Achieved every badge in the game
0.1%
How to unlock the Gameplay master, platinum achievement in Oddworld: Soulstorm - Definitive Guide
Badges are earned by completing challenges in each level, which will have between three and six challenges, each with their own tiers: bronze, silver, gold, platinum. Earn every badge in each level (the platinum tier) and you'll get all four trophies related to the badges. This should be worked on during Step 2 in the Roadmap on your Good playthrough, and then later cleaned up using Level Select as described in Step 3.
Badges are only completed once you have completed the level you are on and that's when relevant trophies will pop. So you must complete the whole level to save the badge progress. Please also note that badge progress is not saved if you die before reaching the next checkpoint. If you earn a badge or badge tier and then die before reaching the next checkpoint, you'll have to do it again.
On the pause menu on each level you can see what the badges are and the total number of required actions to achieve them. The badges will require:
Rescue Mudokons
Straight forward. You'll get this during your Good playthrough.
Apprehend Sligs
Use tape or Bouncy Binding Candy to tie them up.
Hit Sligs with Rock Candy or Brewnade
You can usually mix this with apprehending them if the requirement is Rock Candy, but hitting them with Brewnade will kill them so an additional playthrough of the level may be required. The hardest one of these to get is hitting Sligs with Brewnade in Level 15: The Yards. Fortunately most of the Brewnade hits can be farmed from a single Slig spawn point. See my video here for details. The Slig spawn point is infinite so you can keep hitting Sligs this way to get most of your Brewnade hits here.
Craft items
Simply craft the required number of items. Doesn't have to be a specific item, any will do. Search everywhere and craft everything you can. Some ingredients can be used to craft more than one item, but one item might be needed to craft another, so think about what you're crafting when working towards this one.
Destroy objects
Use your fists, a brew and fire/flare combination, flamethrower, possessed Slig or let the enemy do it! There are wooden boxes, gates and floorboards in some levels and these can be destroyed to count towards this badge.
Spend a certain amount of moolah
Vending machines and moolah gates will count towards this. You may need to repeat relevant levels on Medium difficulty to achieve these badges as the items in vending machines will cost more and help you reach the target. Just make sure you're searching for moolah everywhere you can and you should have more than enough.
Find vantage points
Some levels have stationary binoculars to allow you to recon an area.
Find secret areas
Self-explanatory. If there are signs telling you go to left, go right. If you see a ledge above you, jump up and so on. Search, jump and roll everywhere for hidden areas, which will likely help towards other badges as well.
Collect Royal Jelly
Golden floating orbs that give you full health. Usually found in secret areas.
Collect loot from bins and dumpsters
Self-explanatory. Search bins and dumpsters for progress towards this badge.
Pick up collectibles
Only available in Level 12: The Sanctum. See the videos linked below for walkthroughs of this level where you can find the collectibles that need to be picked up.
Open/unlock lockers
Straight forward as you'll come across lockers throughout a level. Many will be in secret areas as well. However, some lockers will be padlocked and you'll need a key to open them. The key will be on a specific Slig that you will need to pickpocket in a specific level, which won't always be the same level where the relevant lockers are! Collect the keys as you do your Good playthrough and then use Level Select to clean-up the lockers. Please see the video playlist here of me collecting each key.
For a walkthrough of each level showing how to complete the levels, save all Mudokons and collect the badges, click here for a playlist from MrReign. This playlist does not include Level 10: Necrum, Level 11: The Mines or Level 14: Feeco Depot, so click here for the playlist that includes those from Trophygamers. Trophygamers' walkthroughs aren't specifically going for badges so it is advised to use MrReign's videos where possible.
Important tip!
Both walkthrough videos will have you kill the Sligs at the end of Level 17: Eye Of The Storm with the Shrykull power and jump over the floating mines. I found it much easier to use saved up Bouncy Binding Candy to apprehend the Sligs (required for a badge anyway) and then use the Shrykull power to destroy the mines. The choice is of course yours.
This guide was translated automatically.
All the keys.
To get platinum in a spender, for example, a robbery. You need to switch to normal difficulty to make items more expensive.
To get platinum in a spender, for example, a robbery. You need to switch to normal difficulty to make items more expensive.
2 Comments
You don't need to collect all the badges at once. It is enough to take only what is missing when replaying
By DonSleza4e on 04 Jun 2022 09:23
At the Hijack level there is 1 bug (feature), due to which (as well as the notorious randomness) it is not possible to knock out the “Marauder”.
If suddenly you don't have enough 1 box, it's located here
It didn’t break the first time, I had to fly over it for a long time and at the same time shoot at it without seeing its location because of the carriage shutters, until I heard the characteristic sound of a broken box.
If you can’t find this place, then this is secret number 3, I took the information from here:
I noticed such a nice feature that you can complete tasks to get badges using Mudokons, for example: “hot mixture”.
Having given the treasured bottles to their followers, they will begin to throw it even at those sligs that Abe cannot reach.
If suddenly you don't have enough 1 box, it's located here

It didn’t break the first time, I had to fly over it for a long time and at the same time shoot at it without seeing its location because of the carriage shutters, until I heard the characteristic sound of a broken box.
If you can’t find this place, then this is secret number 3, I took the information from here:
I noticed such a nice feature that you can complete tasks to get badges using Mudokons, for example: “hot mixture”.
Having given the treasured bottles to their followers, they will begin to throw it even at those sligs that Abe cannot reach.
By carrneggi on 13 Nov 2023 18:40


 AshtimusPrime
 stratege.ru


