Zone of the Enders HD Edition
25 Achievements
PS3

Damage Control
Earn an A Rank in all 5 rescue missions
5.4%
How to unlock the Damage Control achievement in Zone of the Enders HD Edition - Definitive Guide
 L_490
L_490
 stratege.ru
stratege.ru
This guide was translated automatically.
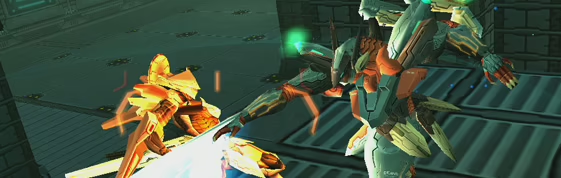
I will analyze each mission separately, but first of all, we will figure out how to defeat the first boss, Tempest, with minimal damage. First, before the battle with him, we make sure to save, and even after the victory we keep the save, because it may still be useful. All the damage suffered in this battle will affect the damage in the second, most difficult (I believe) rescue mission. There is a video guide: https://www.youtube.com/watch?v=k46goD15gjs, but I will also write it in text: during the first phase of the battle, when Tempest is not yet jumping, get as close to him as possible, he will use weapons, no real damage to the environment. Once you deal enough damage to him and the second phase of the fight begins, he will take off. At this moment, move straight to the trench (if you did everything as I described, it will be immediately ahead), and go down to the very bottom, trying not to move much beyond it. Your goal is to prevent the boss from damaging buildings outside the trench. The task is not impossible, but not the easiest one either; I personally succeeded on the third try. And I’ll immediately note - do not rush after the Javelin as soon as you defeat the boss! This can cause unnecessary damage to the environment, it is better to take it after the rescue operation, there you will be safe in any case. Now, after you have dealt with this, let's move on to analyzing the missions:
Mission 1. Location - Town.2
First of all, we immediately move to the right and carefully destroy Mummy. We fight only at high altitudes, or in empty areas, without houses, with other enemies. Not the easiest mission, but by no means the most difficult. At first you will have to get used to it, but everything is passable.
Mission 2. Location - Town.1
First of all, we move to the right and deal with Mummy, and then we move to the trench and lure all the enemies that we can down. We deal with them there. If everything is done correctly, then about three squads will remain on the surface, but we try to work with them carefully in the air, not allowing them to use ranged weapons, and not to use them ourselves. Given my fight with Tempest, I allowed myself two or three signals from the ADA when it reports that damage has been done. First of all, I couldn’t complete the mission to rank A for quite a long time, the damage was 12%, but on the tenth attempt I succeeded. If you feel that the battle with Tempest did not go very well, and the damage that the enemies inflict during the rescue operation itself is too high - reload the save made before the battle with Tempest and try better, but then you will have to go through the first mission again to rank A. I didn’t have to do this, but it’s better to play it safe and keep the save. If you succeed in completing the mission to rank A, you will no longer need a save before the battle with Tempest.
Mission 3. Location - Town.3
This mission is the longest, but I think it's easier than the first two. Many enemies do not move, which gives the player a strong advantage. The tactics are quite simple - lure enemies into the river in the center. First of all, of course, we lure moving enemies, and then the rest. My damage was only 2%, the main thing is to do everything quickly and lure enemies correctly, because Mummy really likes to spoil everything around with its long-range attacks, so, as always, we keep the height.
Mission 4. Location - City.2
The easiest mission, despite the fact that Jehuty is under the influence of a virus. We just move very quickly and destroy a small number of opponents. There are no special features.
Mission 5. Location - City.1
Also a simple mission, compared to the first trays. The bottom line is that you only need to defend one tower, so we carefully drive all the enemies under it and destroy it.
Congratulations! All missions have been completed, which means the coveted rank A in the final score of the game is already close.
Q-Tuzof
stratege.ru
stratege.ru
This guide was translated automatically.
The most difficult part of this achievement is the second rescue operation, since during the battle with the first boss (Tempest) you will most likely cause more than 10% damage to the town, and when you return to this location to perform the second rescue operation, all this damage will be counted (rank And given for all rescued people and damage to the area up to 10%). One of the guides for destroying Tempest with minimal damage is here .
 PSNProfiles
PSNProfiles
We cannot show the content due to copyright protection. Please click the link below to view the guide.