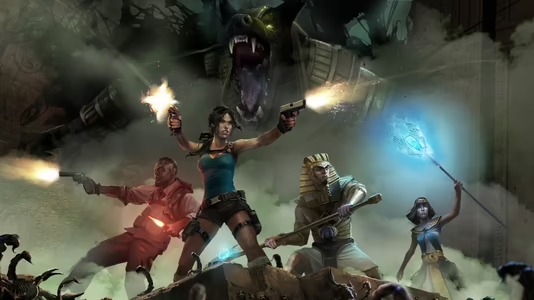
Lara Croft and the Temple of Osiris
40 Achievements
1,000
15-20h
Xbox One
Xbox Series

Who builds their own tomb?
Complete all Architect challenges
30
0.35%
How to unlock the Who builds their own tomb? achievement in Lara Croft and the Temple of Osiris - Definitive Guide
To obtain this Achievement you will need to complete the following challenges.
- Collect all 5 Red Skulls
- Survive The Trap Without Taking Damage
- Destroy All The Arrow Traps In The Tomb
- Gold Challenge 65000
- Finish In Under 7 Minutes
Its actually possible to get all these challenges in 1 attempt but it would still be extremely tricky.
To destroy the Arrow Traps you need to plant bombs next to them, there are 3 areas you'll find these in the tomb.
Surviving the trap can be annoying but if you're not interested in doing all the challenges in one go there is a checkpoint you can use if you fail this. You'll know you're at the trap point because Lara will actually say it but you need to take out all the enemies either side of you without being hit so you need to avoid their shots until they are all dead.
The points depends on weather or not you can avoid getting hit throughout the tomb but if not again use a co-op partner to make it easier for you.
The red skulls are not hard to miss and the speed run isn't too difficult.
2 Comments
After numerous attempts trying to take out the Globes and Enemies at the Trap using the staff and shooting them, I accidentally used the Grenade Launcher and found that it takes both out with about 3 - 4 shots. Got it 1st time using this method
By FoolsAndKings on 29 May 2015 07:56
Glitched
By Hezim 33 on 22 Sep 2022 00:45
I've created a two-part 100% walkthrough video. It covers every single achievement in the game except the co-op ones and the speedruns, but the co-op are self-explanatory and the speedruns are super easy once you've played a level, since you can usually just run past everything and solve the puzzles most of the time. Contrary to some reports, you CAN get the gold points challenge on EVERY tomb on your first time through in solo play. Follow along with the video below as you play through the game (and part 1) to have your 1k in 8-10 hours tops. A detailed text guide follows after the time stamps for those that prefer it, copied over from the walkthrough I've written for this game.
This achievement is for completing all of the Tomb of the Architect challenges.
Timestamps:
0:07 - Tomb of the Lamplighter
13:55 - Tomb of Sobek
18:20 - Challenge Tomb #4
19:12 - Tomb of the Architect
29:44 - Tomb of the Torturer
43:11 - Pharoah
45:32 - Tomb of Set
51:29 - All Hub World Red Skulls
Challenges: Bronze/Silver/Gold – 65,000pts; Complete in under 7:00; Collect 5 Red Skulls; Survive the trap without taking damage; Destroy all arrowtraps in the tomb
During the course of this tomb, any time you see arrow traps (look like barrels shooting arrows), use a bomb on them to destroy them. They’re easy to spot due to said arrows they shoot, and you can hear when they fire as well when near, but just make sure to be thorough and destroy them all. There is one set that will require the Grenade Launcher, which you should have gotten in Challenge Tomb #5 above. As you go down the first ramp, you’ll see your first arrow trap to the left, so destroy all three. One well placed bomb can take three out, but you may need to use more than one. After crossing to the next platform, you’ll see four double traps on the right and three to the left, so destroy all seven and hit the pressure plate. Cross back over the now-spinning round platforms back the way you came and go down into the room on the right.
Continue around the path and across two spinning platforms with jets you’ll have to avoid as you run around them. On the other side, you’ll need to hold to slow the fuse and push the time bomb onto the pressure plate to raise wooden platforms between the spinning cogs. Time your jumps to jump through the gaps in the cogs and across the pit. Continue on and jump to the next moving cog. Shoot the skeletons on the fire side and destroy the orb with your staff’s light to disable the blue barrier and jump across.
Go down the stairs to the right and you should hear/see some more arrow traps, so make sure you destroy them all before you jump down to the next cog. There are six in total. Before jumping to the next big cog to the left, jump onto the smaller two cogs to the right and get Red Skull #1/5. From the smaller ones, jump onto the 2nd bigger cog then onto the next smaller cog. Shoot the eye switch below you when the two orbs are lined up to your left so that you can shoot through both, disabling the blue barrier on the next platform. Use the blue platform to rise up and reach the high powered rifle weapon above.
You’ll see four cogs, two in the center with glowing orbs, and one on each side with an eye switch. The left switch stops the bottom cog’s rotation, while the right switch stops the top one. Stop them so that both orbs are lined up where you can shoot your beam of light through to disable the further of the two blue barriers. The one between the two big cogs can’t be disabled, so jump onto one of the two smaller ones and across to continue. At the bottom of the next ramp you’ll jump onto a large cog and a short scene will show two red flame barriers rise and enemies come out and start attacking you at range. Try to kill them without getting hit, as this is the ‘trap’ referred to in the challenge for surviving the trap without taking damage. If you get hit, restart the checkpoint and try again until successful.
Once the enemies are gone, use the grappling point to the left to climb up and destroy the glowing orb to open the way forward. Jump onto the cog with the red flames and use the grappling point to the right to swing over to the far path without getting hit by the flames. Hit the pressure plate to disable the flame barrier and jump onto the next spinning cog with the red flames rotating. There are some arrow traps to the right of this, as well as Red Skull #2/5 on their platform. The only way to get across is to destroy some with the grenade launcher so that you can jump over to the platform. You can finish off the rest with bombs if you wish. This is the last set of arrow traps, so if you don’t finish the challenge here, you missed one earlier-on.
You’ll have to time your jump carefully onto a small platform between two spinning flame jets in order to reach a pressure plate to disable another flame wall, allowing you to move forward. Just past this, pull the piston out to raise two wooden platforms and jump through the gap in the cog to continue. Head forward up the path through two cogs with gaps, and you’ll see a wall with rising flame obstacles. Use the grappling point to climb up. Once at the top, drop down through Red Skull #3/5 when the flames are gone before climbing back up and continuing. Jump through the three cog gaps and over the crumbling stairs and head up to the next set of platforms.
Jump onto the small stationary one on the right and across the spinning cogs with the red flame jets. There’s a health upgrade in the upper-left corner if you want to go grab it. On the next bridge with, with the flame wall on the left and some skeletons that attack, be sure to check the upper-right corner beside the stairs for Red Skull #4/5. Jump across to the second moving cog and shoot the eye switch to raise a wood platform on the right, then onto it to hit the pressure plate. This activates another pressure plate to your lower-left, so make your way back across the cogs toward it. As you’re crossing, hit the eye switch again to raise the wooden platform to this lower-left pressure plate.
Pressing it activates the final pressure plate in the center of the room, so use the cogs to reach it. Pressing it will remove the flame path blocking the way forward. Now just make your way back across the cogs one last time, hit the eye switch on the way to raise the right-side wooden platform again, and continue on to reach a chase scene. Near the very end of the chase, you’ll reach a spot where you see three cogs going up to the left in a sort of stair-like formation. To the right of these, three very small pillars create an alternate path, and Red Skull #5/5 is sitting on the middle pillar, so take that route.
This achievement is for completing all of the Tomb of the Architect challenges.
Timestamps:
0:07 - Tomb of the Lamplighter
13:55 - Tomb of Sobek
18:20 - Challenge Tomb #4
19:12 - Tomb of the Architect
29:44 - Tomb of the Torturer
43:11 - Pharoah
45:32 - Tomb of Set
51:29 - All Hub World Red Skulls
Challenges: Bronze/Silver/Gold – 65,000pts; Complete in under 7:00; Collect 5 Red Skulls; Survive the trap without taking damage; Destroy all arrowtraps in the tomb
During the course of this tomb, any time you see arrow traps (look like barrels shooting arrows), use a bomb on them to destroy them. They’re easy to spot due to said arrows they shoot, and you can hear when they fire as well when near, but just make sure to be thorough and destroy them all. There is one set that will require the Grenade Launcher, which you should have gotten in Challenge Tomb #5 above. As you go down the first ramp, you’ll see your first arrow trap to the left, so destroy all three. One well placed bomb can take three out, but you may need to use more than one. After crossing to the next platform, you’ll see four double traps on the right and three to the left, so destroy all seven and hit the pressure plate. Cross back over the now-spinning round platforms back the way you came and go down into the room on the right.
Continue around the path and across two spinning platforms with jets you’ll have to avoid as you run around them. On the other side, you’ll need to hold
Go down the stairs to the right and you should hear/see some more arrow traps, so make sure you destroy them all before you jump down to the next cog. There are six in total. Before jumping to the next big cog to the left, jump onto the smaller two cogs to the right and get Red Skull #1/5. From the smaller ones, jump onto the 2nd bigger cog then onto the next smaller cog. Shoot the eye switch below you when the two orbs are lined up to your left so that you can shoot through both, disabling the blue barrier on the next platform. Use the blue platform to rise up and reach the high powered rifle weapon above.
You’ll see four cogs, two in the center with glowing orbs, and one on each side with an eye switch. The left switch stops the bottom cog’s rotation, while the right switch stops the top one. Stop them so that both orbs are lined up where you can shoot your beam of light through to disable the further of the two blue barriers. The one between the two big cogs can’t be disabled, so jump onto one of the two smaller ones and across to continue. At the bottom of the next ramp you’ll jump onto a large cog and a short scene will show two red flame barriers rise and enemies come out and start attacking you at range. Try to kill them without getting hit, as this is the ‘trap’ referred to in the challenge for surviving the trap without taking damage. If you get hit, restart the checkpoint and try again until successful.
Once the enemies are gone, use the grappling point to the left to climb up and destroy the glowing orb to open the way forward. Jump onto the cog with the red flames and use the grappling point to the right to swing over to the far path without getting hit by the flames. Hit the pressure plate to disable the flame barrier and jump onto the next spinning cog with the red flames rotating. There are some arrow traps to the right of this, as well as Red Skull #2/5 on their platform. The only way to get across is to destroy some with the grenade launcher so that you can jump over to the platform. You can finish off the rest with bombs if you wish. This is the last set of arrow traps, so if you don’t finish the challenge here, you missed one earlier-on.
You’ll have to time your jump carefully onto a small platform between two spinning flame jets in order to reach a pressure plate to disable another flame wall, allowing you to move forward. Just past this, pull the piston out to raise two wooden platforms and jump through the gap in the cog to continue. Head forward up the path through two cogs with gaps, and you’ll see a wall with rising flame obstacles. Use the grappling point to climb up. Once at the top, drop down through Red Skull #3/5 when the flames are gone before climbing back up and continuing. Jump through the three cog gaps and over the crumbling stairs and head up to the next set of platforms.
Jump onto the small stationary one on the right and across the spinning cogs with the red flame jets. There’s a health upgrade in the upper-left corner if you want to go grab it. On the next bridge with, with the flame wall on the left and some skeletons that attack, be sure to check the upper-right corner beside the stairs for Red Skull #4/5. Jump across to the second moving cog and shoot the eye switch to raise a wood platform on the right, then onto it to hit the pressure plate. This activates another pressure plate to your lower-left, so make your way back across the cogs toward it. As you’re crossing, hit the eye switch again to raise the wooden platform to this lower-left pressure plate.
Pressing it activates the final pressure plate in the center of the room, so use the cogs to reach it. Pressing it will remove the flame path blocking the way forward. Now just make your way back across the cogs one last time, hit the eye switch on the way to raise the right-side wooden platform again, and continue on to reach a chase scene. Near the very end of the chase, you’ll reach a spot where you see three cogs going up to the left in a sort of stair-like formation. To the right of these, three very small pillars create an alternate path, and Red Skull #5/5 is sitting on the middle pillar, so take that route.
Attention.
This video is just the challenge of speed run, if you have questions about how to do it, follow the video. Yes you can restart the checkpoint and get this and the other challenges.
This video is just the challenge of speed run, if you have questions about how to do it, follow the video. Yes you can restart the checkpoint and get this and the other challenges.


 Deranged Asylum
 TrueAchievements
 LifeExpectancy
 MR GABR1EL 95