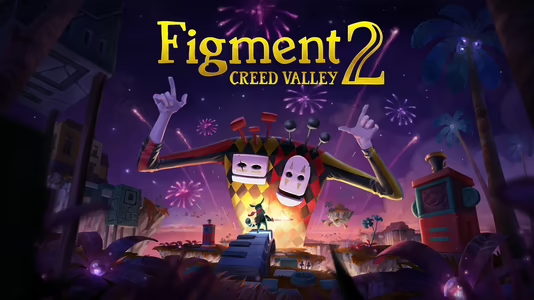

Figment 2: Creed Valley
18 Achievements
1000 XP
Epic

You're a-MAZE-ing!
Complete the entire Ethics Maze without taking any wrong turns
100 XP
1.0%
How to unlock the You're a-MAZE-ing! achievement in Figment 2: Creed Valley - Definitive Guide
 MrIcyDeath
 TrueAchievements
TrueAchievements
You will start out in a map room and need to enter each part of the maze without repeating. If you are going for all shards iv listed the route in (brackets), going for them will not void this achievement.
The order is:
Up Left-->Up Right-->Up Right-->Up Left-->Finish First Trial
*There is a Shard Stone in the Map Room*
Back in Map room-->Up Right-->Up Right-->Up Left-->Up Left-->(Up Right-->Down Left)-->Up Left-->Up Left-->Up Right-->Up Right-->(Up Left-->Down Right)-->Up Right-->Finish Second Trial
*You are in the Ditch, there are 4 Shard Stones here.*
Map Room-->Up Right-->(Up Right-->Down Left)-->Up Left-->Up Left-->Up Right-->Up Right-->Up Left-->Up Right-->(Up Right-->Down Left)-->Up Left-->Up Left-->(Up Left-->Down Right)-->Up Right-->Up Right-->(Up Left-->Down Right)-->Down Right-->Up Right-->*Shard Stone after the Slammer fight* Finish Third Trial
Achievement will unlock
Found a video guide if that is easier:
4 Comments
Perfect and easy to follow, thank you!!
By DenverMax27 on 01 Aug 2023 15:10
If you accidentally take a wrong turn, pause and exit to the main menu and reload and it should put you at the last puzzle you solved. I can verify this works.
By stuntmanjbc on 10 Aug 2023 02:22
 Velvet
Missable, but can be cleaned up by replaying the Ethics Maze.
When going through the Ethics Maze, you’ll need to complete a series of puzzles that require you to ride books between platforms. To get this trophy, you need to complete each of these sections in all 3 Trials without riding an incorrect book to unlock the trophy. Along the way, there will be pathways you can take to collect Remembrane Shards that are not part of the main path. Going for these instead of the main path forward will not negate the trophy, so don't worry about missing out on it if you're going for collectibles. You just can’t go in any wrong direction which causes Dusty and Piper to turn around/start back at the Map Room while riding the book. If this happens, you'll need to restart the stage to unlock the trophy.
When going through the Ethics Maze, you’ll need to complete a series of puzzles that require you to ride books between platforms. To get this trophy, you need to complete each of these sections in all 3 Trials without riding an incorrect book to unlock the trophy. Along the way, there will be pathways you can take to collect Remembrane Shards that are not part of the main path. Going for these instead of the main path forward will not negate the trophy, so don't worry about missing out on it if you're going for collectibles. You just can’t go in any wrong direction which causes Dusty and Piper to turn around/start back at the Map Room while riding the book. If this happens, you'll need to restart the stage to unlock the trophy.
Trial 1
| Map Room | The Map Room is where you'll start. On the floor in front of you will be a "map". The lit circles represent platforms that can be accessed. The dark circles cannot be accessed. The goal is to get to the end without hitting any dark circles. The order to go in is the order listed below. |
| Up+Left | The first platform you come to will have 4 pedestals, each with a book on them (Lecterns). When you hit a Lectern, it and the next Lectern over (going clockwise) will light up. The goal is to get all of the Lecterns lit up at the same time. |
| Up+Right | In the middle of the circle will be a red button you need to stand on. Just dodge the two lines of jester orbs to reach it. Don't forget to roll if you need to. |
| Up+Right | There will be another red button in the middle that you need to stand on, but this time it's surrounded by spikes. Time your running (and rolling) to avoid hitting the spikes and stand on the button. |
| Up+Left | Simply defeat the 3 enemies to progress. |
| First Trial Wall | Cross over the top of the wall to move on to the next Trial. |
Trial 2
| Map Room 1 | The Map may have changed, but it'll be the same concept as before. Follow the path lit on the floor with the books while avoiding the dark circles. The correct order to go is listed below. |
| Up+Right | Another Lectern puzzle, this time there are 5 books and some jester orbs circling around. While avoiding the orbs, you need to hit the Lecterns until they are all lit up. |
| Up+Right | The Orrery puzzle is a game of memory. Within the 8 spheres, there are 4 matches of 2 colors. To reveal their color, just hit them. You need to hit all 8 by matching pairs without missing any between. There are blue, purple, red, and yellow spheres. |
| Up+Left | Defeat the 3 enemies to progress. |
| Up+Left | Map Room 2. This will be similar to the previous maps except it includes spirals. These spiral spots indicate the location of Remembrane Shards (required for the Memories for Memory Completionist If you want to go to the first shard room, go Up+Right to collect the shards, then Down+Left to come back to the Map Room. |
| Up+ Left | The final Lectern puzzle. Just as before, you need to hit the Lecterns so they are all lit up at the same time. The difference in this version of it is that when you hit a Lectern, the ones on both sides of it will light up with it (versus just one like earlier). If at any point you want to restart the puzzle to try again/from the start, simply hit Reload Checkpoint from the pause menu. |
| Up+Left | Another spike puzzle. Time your movements so you don't step on any of the spikes and make your way to the center to stand on the red button. |
| Up+Right | A Pictogram. In the middle of the platform is a picture. On the outer circle are 8 pedestals, each with a piece of the drawing on them. You need to determine which pedestals match up together to create the image in the center without overlapping any parts. |
| Up+Right | Another spike puzzle. Just as before, time your movements so you avoid the spikes, then stand on the red button. If you want to get the second set of shards on this map, from here, go Up+Left to get the shards, then Down+Right to come back to this platform. |
| Up+Right | Defeat the enemies on this platform and the platform up the left ramp to open the door. Defeat the next set of enemies with the Slammer to make it to the wall. This Slammer is the first time you can earn Slam-KABAM |
| Second Trial Wall | Just as before, you need to walk across the blue-block pathway up top. The Engraved Shrine will give you a clue on how to cross it. |
The Discarded Opinion section does not have any effect on the trophy. Simply complete it and you'll return back to the Maze Trials.
Trial 3
| Map Room 1 | Same as before, follow the path of the lit up circles with the flying books. The path you need to take is listed below. There is one spiral branch here that leads to some Remembrane Shards. Getting these will not negate You're a-MAZE-ing! |
| Up+Right | Defeat the enemies to move forward. If you want to get the Remembrane Shards on this map, from this room, go Up+Right to get them. Go Down+Left to get back to this room. |
| Up+Left | Another Orrery Puzzle, but this time, the orreries are rotating in a circle. It'll be the same game of memory with 4 pairs of colors otherwise. |
| Up+Left | Defeat the enemies to progress. |
| Up+Right | Map Room 2. As with the previous Map, there is only one spiral platform on this one that will give Remembrane Shards. The correct path to make sure you don't take the wrong book is listed below. |
| Up+Right | Birdhouse Puzzle. This is an auditory puzzle, though you can also use the holes on the central birdhouse if need be. In the outer circle are 8 birdhouses, each with a 2-4 hole pattern on them. These represent music notes. Every birdhouse starts on the same note and will either go up or down in pitch. If the next hole goes up, the pitch will go up. If the next hole goes down, the pitch will go down. When you hit the center birdhouse, a jingle will play. You need to match the jingle up with the birdhouse on the outer circle based on the holes it has. You need to get 3 in a row correct to move on. The jingles produced are random, so there is no one single solution available for this puzzle. |
| Up+Left | Another spike puzzle, but this time the spikes take up two blocks each instead of just one each. Time your steps with the spikes and make your way to the button in the middle. |
| Up+Right | Dodge the jester orbs and hit the button in the middle. If you want to go for the shards on this map, from this room, go Up+Right to get them. Then go Down+Left to come back to this room. |
| Up+Left | Map Room 3. The same as the previous maps, but this one has 2 spiral locations where you can pick up some Remembrane Shards. The correct path to take is listed below. |
| Up+Left | Defeat the enemies to move on. If you want to get the first set of Remembrane Shards on this map, from this room, go Up+Left to get them. Go Down+Right to get back to this room. |
| Up+Right | The second Pictograph. Just as before, you need to hit the pedestals that match up together to create the picture in the center without any pieces overlapping. |
| Up+Right | Defeat the 3 cannons to continue forward. If you want to get the second set of Remembrane Shards on this map, from this room, go Up+Left to get them. Go Down+Right to get back to this room. |
| Down+Right | The second Birdhouse Puzzle. Just as before, hit the central birdhouse and it will play a jingle. Match the jingle up with one of the surrounding birdhouses based on their holes (a hole going up indicates a higher pitch and a hole going down indicates a lower pitch). Hit 3 in a row to move on. |
| Up+Right | Defeat the enemies on all 3 platforms to unlock the door. Just after the door will be another Slammer enemy. If you didn't get Slam-KABAM |
| Trial 3 Wall | Just as with the other two walls, you need to find a way to walk across the top of it and into the next area. Interact with the Engraved Shrine for a clue on how to cross over. |
As long as you completed the entire maze without jumping on any of the incorrect books, the trophy will unlock as soon as you cross the wall for Trial 3.
Blood_Velvet, Velvet_Bee
 PSNProfiles
PSNProfiles
We cannot show the content due to copyright protection. Please click the link below to view the guide.