Halo Wars
58 Achievements
1,200
82-104h

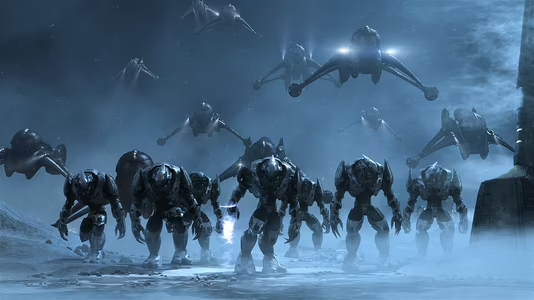
Wall of Recognition
Got a Gold Medal on every Campaign Mission
30
How to unlock the Wall of Recognition achievement in Halo Wars - Definitive Guide
 snake42069
 TrueAchievements
TrueAchievements
--------------------
Act I
Mission 01 - Alpha Base
This level can be one of the trickiest ones to complete on Legendary, especially if this is your first time on this difficulty. You will only be given a limited amount of units as you progress through the level and due to limited resources you are only able to heal/repair once in the whole mission. Luckily however this level isn't particularly long so if you can get the method done correctly you will be able to complete it quickly and without hassle. The basic tip for this is to activate all helpful skulls especially 'Boomstick'. This way theres a 5% chance of enemies exploding and killing others upon death. After you're ready for all this just make sure to keep Sgt. Forge at range from all ground units, they won't be able to shoot you but you will them, turrets however can reach you so make sure you send other units closer to the turret first and then Sgt. Forge as he deals the most damage. Once you get to the last part of the level, use marines to destroy the shield, run back to the ice and let all the enemy infantry come to you. Dispose of them, move forward, let the automatic carpet bomb destroy the wraiths and then all thats left is to kill the remaining infantry behind covers.
P.S. If the 'Boomstick' skull is on, stay away from enemy infantry and at no point should you ram them with warthogs, if they explode upon death you will lose all nearby units.
Meet Sergeant Forge
Completed Mission 1 on any difficulty
5
Mission 02 - Relic Approach
As soon as this starts, build the required buildings, collect resources with marines and Sgt. Forge and then sell your Barracks, build 4 Supply Pads, 2 Reactors and 1 Vehicle Depot. Make sure to upgrade all Supply Pads to Heavy, build 4 Turrets, upgrade the back 2 to Flame Mortars and the top 2 to Missile Launchers. Once your base is complete you'll want to build 7-8 scorpions and upgrade them fully (canister, etc) and build 3-4 cobras (fully upgraded). This will be enough once fully constructed to take the initial garrisons out along with the mass of hunters there. Once this is done, move up to the enemy base in the north middle of the map, move your scorpions up and deploy your cobras behind them. The cobras will make light work of the base along with the scorpions secondary fire. Claim this base and build a Vehicle Depot, Barracks and all 4 Turrets with Flame Mortars. You will probably have lost 1-2 scorpions so build several marines so that you can take out the shield up ahead North bound. Move the marines back and move the scorpions up, deploy the cobras where the shield was (once the scorpions have moved up) and they will supply adequate cover. Move the scorpions up to the end of the map and destroy any units and the Detonator.
Mission 03 - Relic Interior
This level will supply you with 2 of possibly the strongest units for the U.N.S.C.; the Grizzly. These are upgraded Scorpions with twin cannons and damage improved. With all the bonus skulls on (especially 'Boomstick') the Grizzlys will be able to pretty much walk the first half of the mission without any problem. Just make sure for any hunters or turrets you fire secondary shells for improved damage. Once you reach the area with Sgt. Forge and Anders make sure you assign Anders to heal the Grizzlys and then move to the east side of the map, garrison marines in all possible towers to improve their defense. Make Anders activate the bridge and simply use your Grizzlys to defend against the Covenant spawn holes. Once she's completed the activation, let a large amount of enemy units come over the bridge and then deactivate it whilst their in mid-stride, easy kills and the A.I. wont adapt on Legendary to learn to stop moving troops over. Send your Grizzlys over and take out the Wraith, kill all other spawning units and then move everyone up to the centre of the southside. Move the Grizzlys up the ramp and start to kill any hunters that come from the sides, then just run Sgt. Forge and Anders up the ramp to the Pelican Transport at the top.
Act II
Mission 04 - Arcadia City
This level is seen by many as quite possibly the hardest and most frustrating level of them all. Make sure you do this in solo (as this one is definitely easier and you gain the save ability which on this mission is priceless) and activate or of the skulls stated at the beginning of the guide. For this mission you will need to dedicate all of your time on protecting one cargo ship and one only, preferably number 2 as its in the corner making it easier to defend as well as being furthest away from the covenant base (South-East corner of the map). If your trying it on co-op and are having trouble and determined not to do it on solo make sure to capture both available bases as soon as their available for additional resources and an extra target for the covenant to buy you some time. Anyway back to the solo version; use all units from the beginning to take out enemies at the south middle area, then move directly to cargo ship 2 leaving a normal warthog where you began the level so you can build a base as soon as it becomes available. After cargo ship 3 is destroyed (crashes) make sure to build your base, start with 1 Reactor, then 2 Supply Pads, upgrade the main base, build 2 more Supplies, upgrade again, build 1 more Reactor, and finally an Air Pad. If you can afford to I would recommend building a Field Armory instead of an Air Pad, so you can upgrade both your turrets and unit cap +10, once thats done, recycle the Field Armory and build an Air Pad. Spam constant Hornets over to cargo ship 2 and place them near the waters edge to the right side of the ship. With this in place make sure to save the game. Hold this and try and build turrets on your base to distract some of the oncoming units as to buy you so needed time. Make sure to heal your cargo ship as soon as you see any banshees or vampires incoming as they will attack the ship directly regardless of your units defending it as well as crash landing into it when they die. This should be successful enough to defend the cargo ship until the timer depletes. Occasionally the Covenant Uber Turret will destroy the cargo ship, theres no way of stopping this and it rarely happens, simply re-load your save and hopefully it wont happen again. Make sure to constantly heal when required as well as using your carpet bomb on any hunters, wraiths or locusts that come over the bridge. Using this you shouldn't have any problems.
*This technique also works in co-op but as stated will be considerably harder.
Mission 05 - Arcadia Outskirts
In the beginning of this mission you will be given a limited amount of units and are required to head South-East to establish a base of operations. Instead of taking the direct route at the start, head down the south route and around, it'll take a little bit longer but you'll run into less enemies in general. Once you reach your base location and wipe out any remaining units make sure to garrison your Spartans in cover, preferably the Jerome and Douglas in the front facing two and Alice in the one covering the rear next to an overhang bridge (this is where constant units of hunters and elites will attack from in small waves). Build your base and try to set up the majority as supply pads, with a few reactors and a Field Armory. Upgrade the population, turret and Mac Blast (this one especially as you will need it later). You will be given a few sets of reinforcements; including, several infantry and a cobra from each pelican. Make sure to move the cobra up towards the front of your base and deploy, as otherwise they wont be able to shoot up the hill at incoming attacks. Also, garrison any spare infantry in any available spots. When the Covenant Uber Turret comes online make sure to use your 4x Mac Blast on it when it fires, as you should be able to get the shot off before it dissapears into the shroud, it may take 2-3 sets of Macs before it is gone, but trust me, in the time given its the safest method for destroying it (if it does shoot; most of the time it will aim at Sgt. Forge, I dont know why though, but its better than destroying supply pads). Once upgrades are finished, recycle the Armory and build a Vehicle Depot (you could build a Air Pad instead it depends if you prefer Scorpions or Hornets for a main assault). Upgrade the shell canister ability and begins building Scorpions, I would suggest getting any irrelevant infantry killed to free up unit population cap. Hold off the constant waves of attack until approx. 20 minutes of gameplay have passed by, this will bring a cut scene and Spartan Omega Team will become available to control (6 more Spartans). With this in place it should be suitable to wait for another wave of attack, destroy as many units as possible, perhaps high-jack some Wraiths with machine-gun equipt Spartans as they are the least effective against buildings and vehicles, then go on the counter-attack. Move towards where the Uber Turret used to be, make sure to destroy all units around that area and construct a second base, build a barracks and some supply pads. When ready send all units to area from the very beginning of the level, as this is where the main Covenant base is and is also the objective to destroy. With scorpions, spartans, cobras and possbility wraiths the bases defense and any remaining units shouldnt be a problem to dispose of. If any problems arise, remember that you have a 4x Mac Blast available which is devastating against pretty much anything. Once the base is destroyed the mission is completed.
Mission 06 - Dome Of Light
This mission can be tricky and repetitive as A.I. uses fully upgraded hunters ALOT on most difficulties. NOTE:*Please make sure you memorize all rhino destinations, become familiar with this level and its layout before attempting this method, it will make things considerably easier*.
When you have done the stated information above, begin by filling you base with 4 supply pads, 1 reactor, 1 field armory and 1 vehicle depot. Send your infantry to garrison the 2 free reactors; 1 behind the base and the other just to the east of the base, these will free up a much needed spot on your fortress as well as counting as a garrison for units. Wipe out initial units and garrison your spartans in the large towers (3 towers north of the base) putting the Jerome in the one closest to the base (to take down constant incoming banshees. Build 2 anti-air turrets on the rear of the base and 2 anti-infantry on the front. Upgrade unit population and training times as well as turrets from the Armory, and then upgrade canister shell in the Vehicle Depot. Fill you population with Scorpions and move ALL of them to Rhino Destination #2 (this is crucial and you will see why; when Rhino #1 is delivered a base will spawn at #2's destination, with the Scorpions there the base will be destroyed in a matter of seconds saving a lot of time and patience). Request first Rhino and move to destination #1. Destroy the newly build base at site #2 and request Rhino #2. Request a pelican transport for Sgt. Forge and move him to destination #3 by himself, do not request Rhino #3 yet. Move all Spartans into Scorpions as this way they become considerably stronger. Move 4 Scorpions to what will become Rhino Destination #4 and 4 more Scorpions to Rhino Destination #5 as when Rhino #3 is delivered to its destination locations #4 and #5 will spawn Covenant bases which can be tiresome. Request Rhino #3 and Pelican Transport it up to Destination #3. (Make sure to leave all remaining Scorpions at Destination #1 so that they can protect Rhino's #1 & #2 as well as being able to support your Main Base if it were to be attacked) Destroy Covenant bases at locations #4 and #5 and quickly request Rhino #4 and Pelican it over to number #4, move it into the spot, then quickly do the same for #5. This should complete this part of the mission. Then all that remains is to relax and Mac Blast the hell out of the Covenant Base setup inside the shielded area. Enjoy!
Mission 07 - Scarab
This mission is actually very easy, people just perceive that because it is an uber structure and over powered that this mission will be impossible. Don't fret! This guide will help you complete this level with ease and possible in Par Time with a Gold Medal. My method was simple, build Scorpions, upgrade them with canister shell, move them in groups of 3-4 at anytime, take each node out with a Mac Blast and Canister Shell when Scorpions were in visibility of them.
*However* thanks to FissionXMailed and sourced by gamefaqs this method is available:
Build a barracks, upgrade marines with 'New Blood'. Clear the Node directly North from where you start, as well as the sniper tower next to it. Garrison marines in the tower. This will cause the Scarab to spot the unit and shoot them, however for some unknown reason they wont die via the Scarab blast and thus the Scarab will constantly be shooting the Tower giving you ample time to destroy Nodes, enemy units and eventually destroy the Scarab.
You may still need to get Scorpions, upgrade to Canister Shell, but this time, you can have all Scorpions go round the map together without any worry of the Beam, so long as you don't go through the Beam or go in front of the Scorpions direct line of fire with the Tower. Done!
Act III
Mission 08 - Anders' Signal
This mission on Legendary means that the Flood pretty much eat up and basic infantry you use, so my suggestion is to really overuse the Spartans to the maximum as they have; longer range, more fire power, more health and can't permanently die. So, at the start move the elephant up close enough for Spartan Team Alpha to drop in and attack the Brutes from the rear. At this point their A.I. controlled and can't die so just stand back and let them kill all the brutes. Once their all wiped out, move around to the middle area of the map and choose whether to attack the flood base to the south or the one to the west, either way, use carpet bombs on the Flood Launchers when you have the chance and make sure to destroy all tentacles around the Elephants before destroying the eggs. As soon as you retake an Elephant move it directly back to the newly established Main Base a little to the North-East of the middle of the map. Again, use your Spartans to re-take the last remaining Elephant using the same technique as the previous one, along with a carpet bomb and it'll be yours in now time.
Mission 09 - The Flood
For this mission you'll be required to set up a base, relocate Alpha Team, and destroy the Flood Main Structure. The easiest way I found to do this level is to build up 5 supply pads, 2 reactors and 1 field armory. Upgrade 3 turrets to flame and 1 to missile. Select 2 of your elephants and move them to the un-occupied base to the north-east they'll get there without any hassle. Move the last elephant to the front side of your first base and deploy for defense. Build up your second base, more supplies and 2 Air Pads. Ugrade unit cap, turrets and carpet bomb, get your 2 elephants destroyed and then build max hornets (with all upgrades if poss.). Move all hornets to Alpha's location (middle north-west). Save the Spartans and get them to jack 3 of the hornets, move all hornets up to the Flood Main Base, carpet bomb it and get the hornets to finish it. Mission Complete.
Mission 10 - Shield World
Another time-limited mission, however this can be adjusted according to how you play it out. There are 3 teams of UNSC that the mission requires you to save. *However*, you do not have to save the first, only Alpha Team is a requirement for completion of the level. So if either of the other teams dies don't worry, you wont fail or need to restart, just keep playing. For this level use Scorpions and Wolverines to max upgrades and max unit cap, use heal/repair whenever you can and this level shouldnt be too much of a difficulty. Time however can cause problems for some people, as the initial base construction can take some time. So for people struggling on time, locate all 4 of the areas to send gremlins to EMP for additional time. Send them to that location and just before their about to take a shortcut through a Flood base send a Cryo Bomb over the Swarms and base to slow them all down. With this the Gremlins will make it to the spots without any hassle, if not, try sending 2 or 3 together, this will work regardless. Meet up with Alpha Team and escort them back to the Pelicans at Main Base and mission complete!
Mission 11 - Cleansing
This level can be done in a matter of minutes if your fast enough and get a technique going. Firstly, choose one infirmary that you'll put all your ground units by to protect, I initially chose the pad that lets you construct Hornets as these are the best unit to use in this level. Once you've build as many hornets as your cap allows, make all ground units stand next to and protect one infirmary whilst your hornets go around cleaning all sides of the ship. The technique is to destroy all the buildings before the first Wave arrives that way they'll all be permamantly destroyed. After that all you have to worry about is maybe 1-2 flood structures to destroy before the next wave and a hand full of flood units. With the Hornets this will be no problem, and remember to use heal/repair on the last infirmary if its in dire need. Turrets are also available to build to help defend it. Kill all red dots on your mini-map and the levels complete.
Act IV
Mission 12 - Repairs
This mission can go one of two ways, it can be completed with ease and no problems (usually within less than 3:30) or it can go completely wrong, you can get over run with enemies and unable to defend, let alone counter-attack in any form, meaning your unable to complete the mission. So, as soon as this mission begins, head straight to the infirmaries and spam as many cyclops' as you can, build half from one infirmary and half from another, as to maximize building time. Move all other units, spartans, hawks, marines etc, close to the Core, next to the platforms heading up to stop Covenant infantry rushing down. Place the waypoint for all Cyclops next to the Core and make sure they are all repairing the core and not attacking random oncoming hunters. Use your heal/repair ability as often as possible (whenever its available) and this should be done in less than 4 mins. If it goes wrong as I said it may, just restart and try again.
Mission 13 - Beachhead
This is probably the longest mission in the campaign, so make sure if done in solo (which I recommend) then save as often as you can when things are going well. From the start, use the teleporter and save as many units as possible. Protecting Anders isn't hard as there are only a few enemy units, once she's been evacuated you'll be given Spartans; Jerome, Douglas and Alice as per usual. Select all units and head south to take control of the first Covenant base. Hi-jack wraiths and locusts (especially) when you get the chance as these will help destroy the base alot faster and more easily. Once you get control of your first base, build all anti-air missile turrets as you will be barraged by banshees constantly for the duration of the mission. Build 4 supply pads, 2 reactors and a field armory. Upgrade unit cap, turrets and Mac Blast. Once done, recycle the armory and build an Air Pad. Upgrade Barrage and build max Vultures. Head to the middle of the map to take over Base #2 with Spartans on foot and then with your Vultures. Destroy the base, rebuild it, move south and capture the un-manned Scarab (activate skull - Wuv Woo for bonus fun!). Move the Scarab and Vultures to the west to Base #3. Destroy and rebuild it. Heal/Repair all units and move to teleporter, to the north of base #3. Through the teleporter you'll find a scarab, a large dose of Elite Honour Guard and the final base. Make sure to Barrage the enemy Scarab and heal when possible. This should rap up the level.
Mission 14 - Reactor
This mission can be reduced to a relatively short an easy one if done correctly. Build up your base, 4 supply pads, 2 reactors, and a field armory as per usual. Upgrade unit cap, Mac Blast and training speed. Recycle and build an Air Pad, upgrade Barrage and build Vultures to full unit cap. Move up North-west to second level, destroy Scarab and Base #1 use Mac Blast if you need more 'Bang for your Buck'. Rinse and repeat this for third level base and fourth level base, as each one has a Scarab. Once all bases are fully destroyed and in control move the Elephant and Nuke up with the Spartans (to protect it from Regenerating Flood Buildings). Level done.
NB: Enjoy the best cinematic in the game.
Mission 15 - Escape
Same method as the last couple of missions (#13 & #14) this time you'll have a time limit though. Same base as usual, upgrade Mac Blast (this important!) and make sure you build max Vultures with Barrage (unit cap is higher on this level by +10) use turrets and Spartans to protect the Main Base and the Vultures to activate all doors. Activate the one in front of you then follow the arrow to the next. There'll be a Scarab patrolling the middle ring so Mac it and barrage it to take care of that pest. Activate the door then move on to the left one from it. Destroy the Covenant base, heal vultures then move to the opposite door, activate it, destroy any floor near the door then move to the door above that one, activate it then you've only got the bottom left door remaining. This has a Covenant base, but when I did this on any difficulty, I wasn't required to destroy the base, simply have vultures above the door and clear the units around it, and it should become available. Level and Campaign Complete!
----------------------------------------------------
After trying this strategy on legendary i realized it doesnt help get gold on that difficulty, but it will help you complete the level without getting annihilated. you can beat on legendary or you can get gold, but not both at same time, at least not with this strategy.
 theredjacket
TrueAchievements
TrueAchievements
As a note, it's boring having no units so be kind and let your friend do all the maintenence within the base so they have something to do.
 Brawler rocks
TrueAchievements
TrueAchievements
Then you start a mission you did not gold on the campaign, difficulty is up to you, and play through it as you normally would.
When you are at a part you can easily perform before you finish the mission, turn on all of the debuff skulls and your score will increase by a few hundred points. A little bit I know but still it is better than nothing.
These are some of the easy parts that I found out after some trial and error where you can activate the skulls so that it will help increase your score:
Mission 1: When you are retaking Alpha Base after you destroy the shield generator send in Forge, alone or with a few warthogs and ram every enemy.
Mission 2: Either after you open the shield door leading to the ruins, after you kill the reinforcements the Covenant send. or when you begin to attack the detonator.
Mission 3: When you cross over the bridge turn on the skulls and when any amount of Covenant are on it get rid of the bridge, go to where the Hunters appear and just kill them until you complete the optional objective.
Mission 4: In this mission this variable, you can activate it at any time since this is mostly a bodyguard mission but I would suggest to activate the skulls either after the Pelican blows up or after you improve both bases.
Mission 5: After you blow up the weapon and are begining you're attack on the Covenant base.
Mission 6: Once again variable since there is not many enemies but recommended until after you have equipped your turrets with missles to destroy banshees and have some marines in the towers.
Mission 7: Either after you have destroyed some or all of the Locusts and are preparing to destroy the power nodes, or while you are attacking the scarab.*
*Be tactical if you lose to many units your combat bonus will drop
Mission 8: After you made the second base or after you destroyed all of the flood that shoot that goop at you near the second elephant.
Mission 9: After you have enough Hornets to put all of the Colonies in hibernation or while all of the Colonies are in hibernation and you attack the boss.*
*If all of the Colonies are in hibernation when you kill the boss you will also get the achievement "Sweet Naptime".
Mission 10: Another variable one but I recommend that while rescuing the last squad you take them near the LZ, activate the skulls,and take out as many enemies as you feel you need to.
Mission 11: This is yet another variable one because of this mission's simplicity but it is best to activate the skulls after you destroy all of the flood that shoot goop at you and build alot of turrets and let the setinels do the job for you.*
*If you want to speed up the process then by all means go ahead, just remember to go back to the airlocks while you get scanned.
Mission 12: Anytime at all just remember to focus on building Cyclops and healing the engine.
Mission 13: For those confident enough as soon as you get the Scarab, or if you are not to confident after you destory the enemy Scarab.
Mission 14: After you destroy the second or while you attack the third Covenant base.
Mission 15: After you destroy the Covenant base (make it top priority), or while activating the last two switches.
You do not have to agree with me but these I found were the best places to activate the skulls to get a bit extra points without adding to much of a challenge to the game.
 DealerDan
TrueAchievements
TrueAchievements
Now basically aim for two things: (1) 5x Par Time bonus and (2) 10x Combat Bonus. Build a solid enough army on each level and just rush everything. Don't let anything die. Use the heal, use the mac attack, just try your best not to let anything die.
Also make sure you research to add +10 to your army.
At the end of the level just before it's beat build a barracks if you don't have one, and pump out marines until you hit your unit cap. Then turn on all the "bad" skulls which will increase your score, then finish the mission.
 ChubbyWiggins95
TrueAchievements
TrueAchievements
 LIONHEARTDRAKE
TrueAchievements
TrueAchievements
 WhineyRabbit, mmartynn, Spellruler
Here are the scores required for each Gold Medal:
Mission 01: 27,000
Mission 02: 70,000
Mission 03: 45,000
Mission 04: 50,000
Mission 05: 40,000
Mission 06: 45,000
Mission 07: 32,000
Mission 08: 30,000
Mission 09: 35,000
Mission 10: 55,000
Mission 11: 30,000
Mission 12: 32,000
Mission 13: 40,000
Mission 14: 30,000
Mission 15: 30,000
Note: If you play the levels in co-op both you and your partners scores are added together. The gold medals can be earned on any difficulty or any combination of difficulties. For example you could have gold medals on half the levels on Normal, then go back and get the rest on Easy, or get them all on Heroic.